

Last updated March 22, 2024
By Sarah Tolchin, 2022 Government Affairs Intern
To create a new IRS online account, you need to register with ID.me. If you set up an account under the IRS’ previous system and already have an IRS username, you can use that to log in instead. (See step 2)
What is ID.me?
ID.me is a system used to securely verify your identification for different services. It is used to access federal benefits through the Social Security Administration and the Department of Veteran Affairs as well as benefits through several state agencies.
Why should I create an IRS online account?
When you create an IRS online account, you can view information from tax returns you’ve filed, including information about stimulus checks and advance payments for the 2021 Child Tax Credit. You can also get tax transcripts, request an IP PIN, change how the IRS sends you certain information, and manage payments if you owe taxes.
There are currently two ways to create an ID.me account, self-service and video assisted service. This guide provides step-by-step instructions for both options.
Creating a new IRS online account
You will need:
- Photo identification: Driver’s license, State ID, Passport, or Passport Card. If you don’t have one of these, you may still be able to create an account using the video chat option (Step 13) if you have other approved documents.
- A computer or cell phone with access to the internet and a front-facing camera: You can use either a computer or a cell phone to create an account. This guide uses a cell phone which makes the process easier.
- Full legal name
- Your Social Security number (SSN) or Individual Taxpayer Identification Number (ITIN)
Step 1: Visit the IRS website to access the “Your Online Account” Page
Go to https://www.irs.gov/payments/your-online-account
Click the blue “Sign in to your Online Account” button.
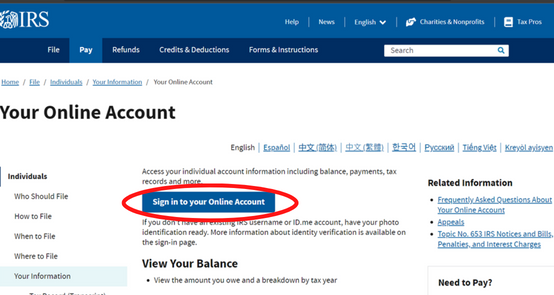
You will be taken to this page: https://sa.www4.irs.gov/secureaccess/ui/?TYPE=33554433&REALMOID=06-0006b18e-628e-1187-a229-7c2b0ad00000&GUID=&SMAUTHREASON=0&METHOD=GET&SMAGENTNAME=-SM-u0ktItgVFneUJDzkQ7tjvLYXyclDooCJJ7%2bjXGjg3YC5id2x9riHE98hoVgd1BBv&TARGET=-SM-http%3a%2f%2fsa%2ewww4%2eirs%2egov%2fola%2f
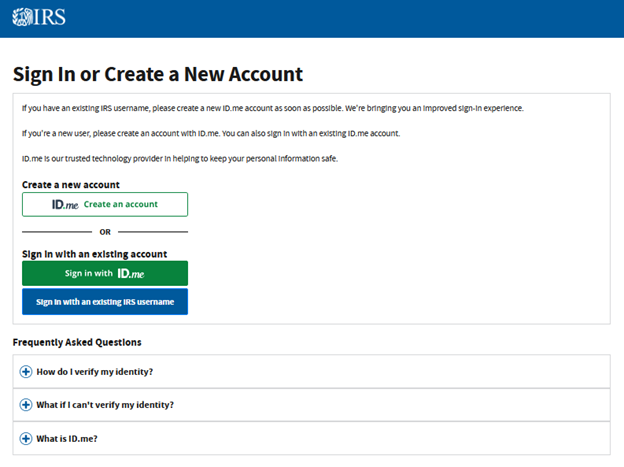
Step 2: Create an account
IF YOU ALREADY HAVE AN IRS ACCOUNT, YOU CAN SIGN IN WITH YOUR EXISTING IRS USERNAME BY CLICKING THE BLUE BUTTON
If you have created an IRS account to view information from previous tax returns, including the amount received for stimulus checks, you can sign in with your existing IRS username.
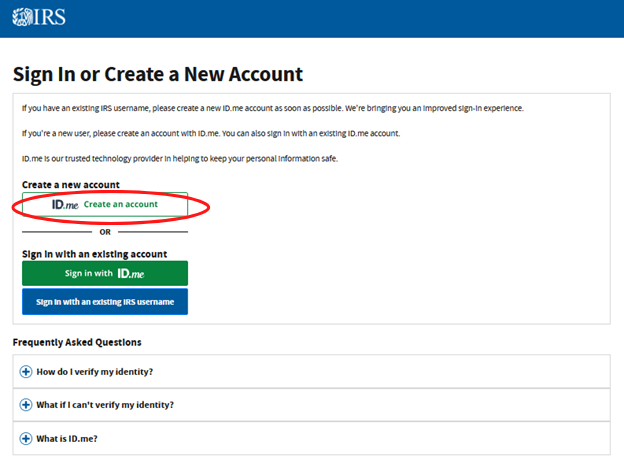
If you don’t have an existing IRS username, you will need to create a new account. Click the white “ID.me: Create an account” button.
 You will be taken to this page: https://api.id.me/en/registration/new
If you want to complete the form in a language other than English, scroll to the bottom of this page and click the word “English” in blue. From the drop-down menu, click your preferred language.
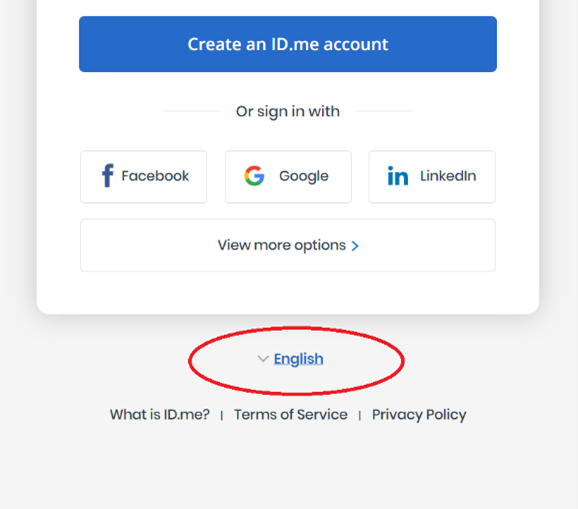
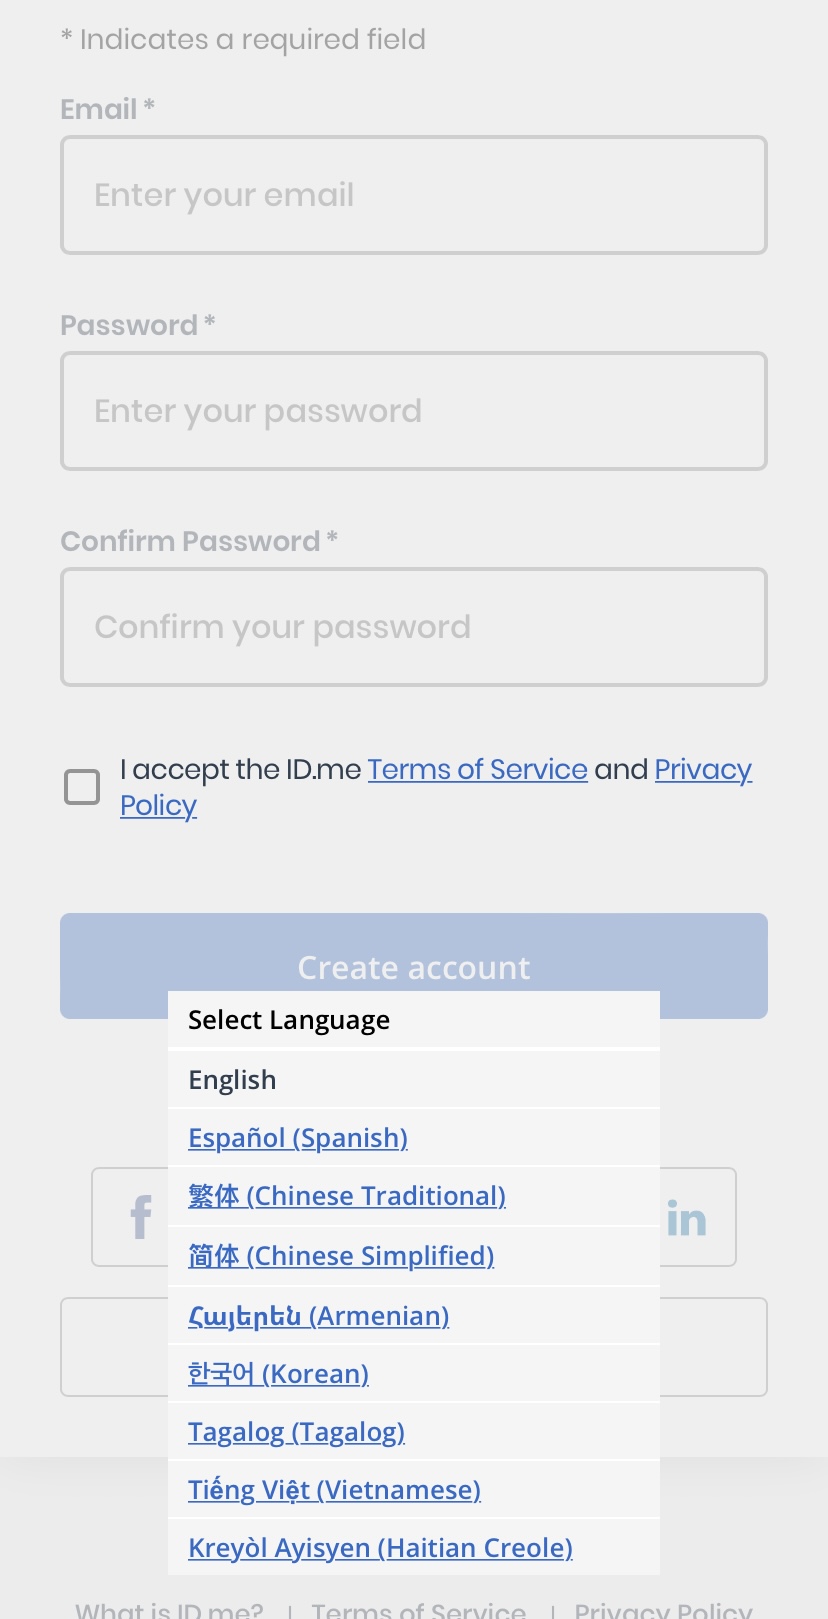
The instructions on this page are for creating an account in English.
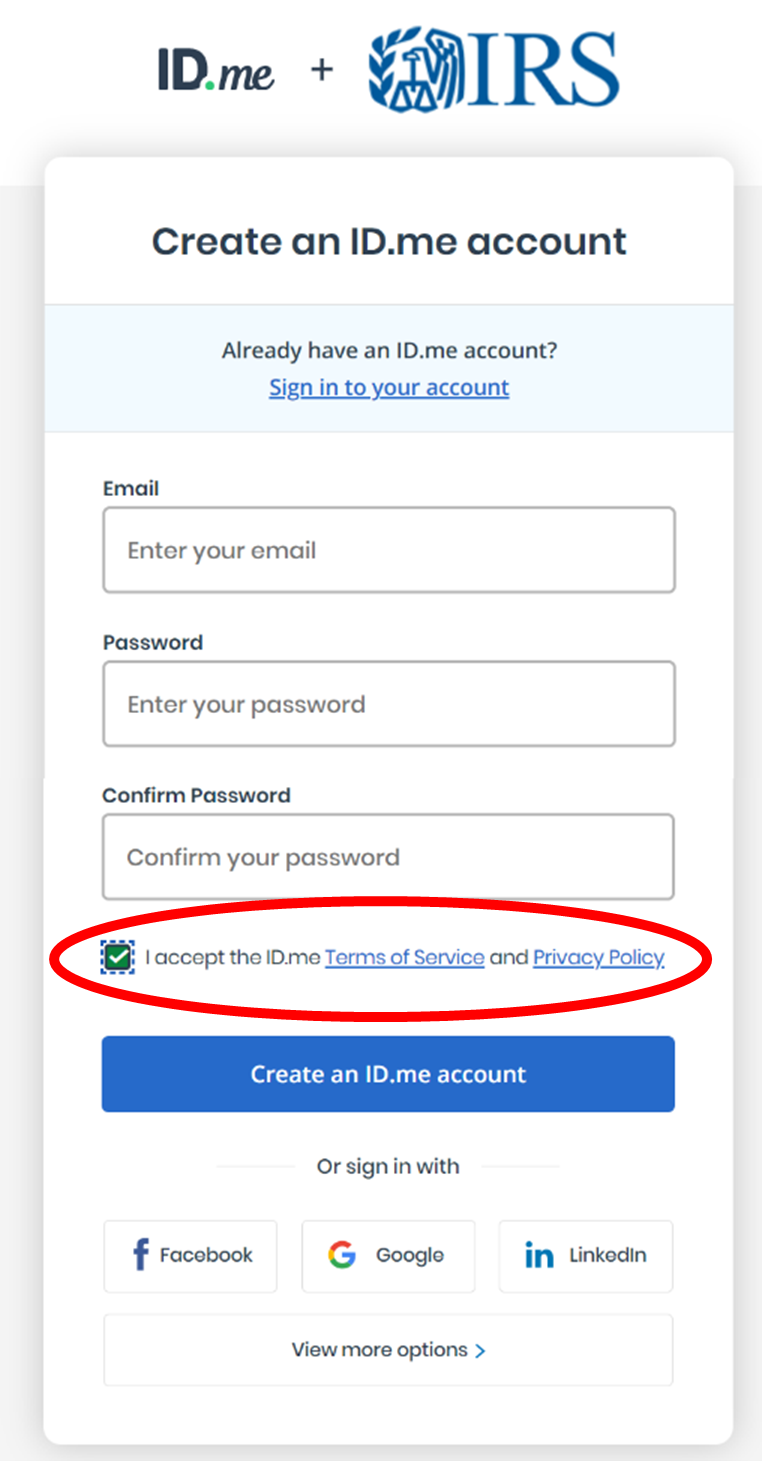
Step 3: Fill out the information to create an account
You will need:
- Email address: Use an email address that you have access to. If you don’t have an email address or don’t remember or have the password to your account, you can create a new email address for free through a website like Gmail, Yahoo! Mail, or AOL. You will need to check your inbox to confirm your email address to successfully create an account.
- Password: ID.me requires both upper- and lower-case letters, 8 characters, and a number. Choose a phrase that you can remember or write down your password in a secure place.
Check the box “I accept the ID.me Terms of Service and Privacy Policy” after reviewing the links. Then click the blue “Create an ID.me account” button.
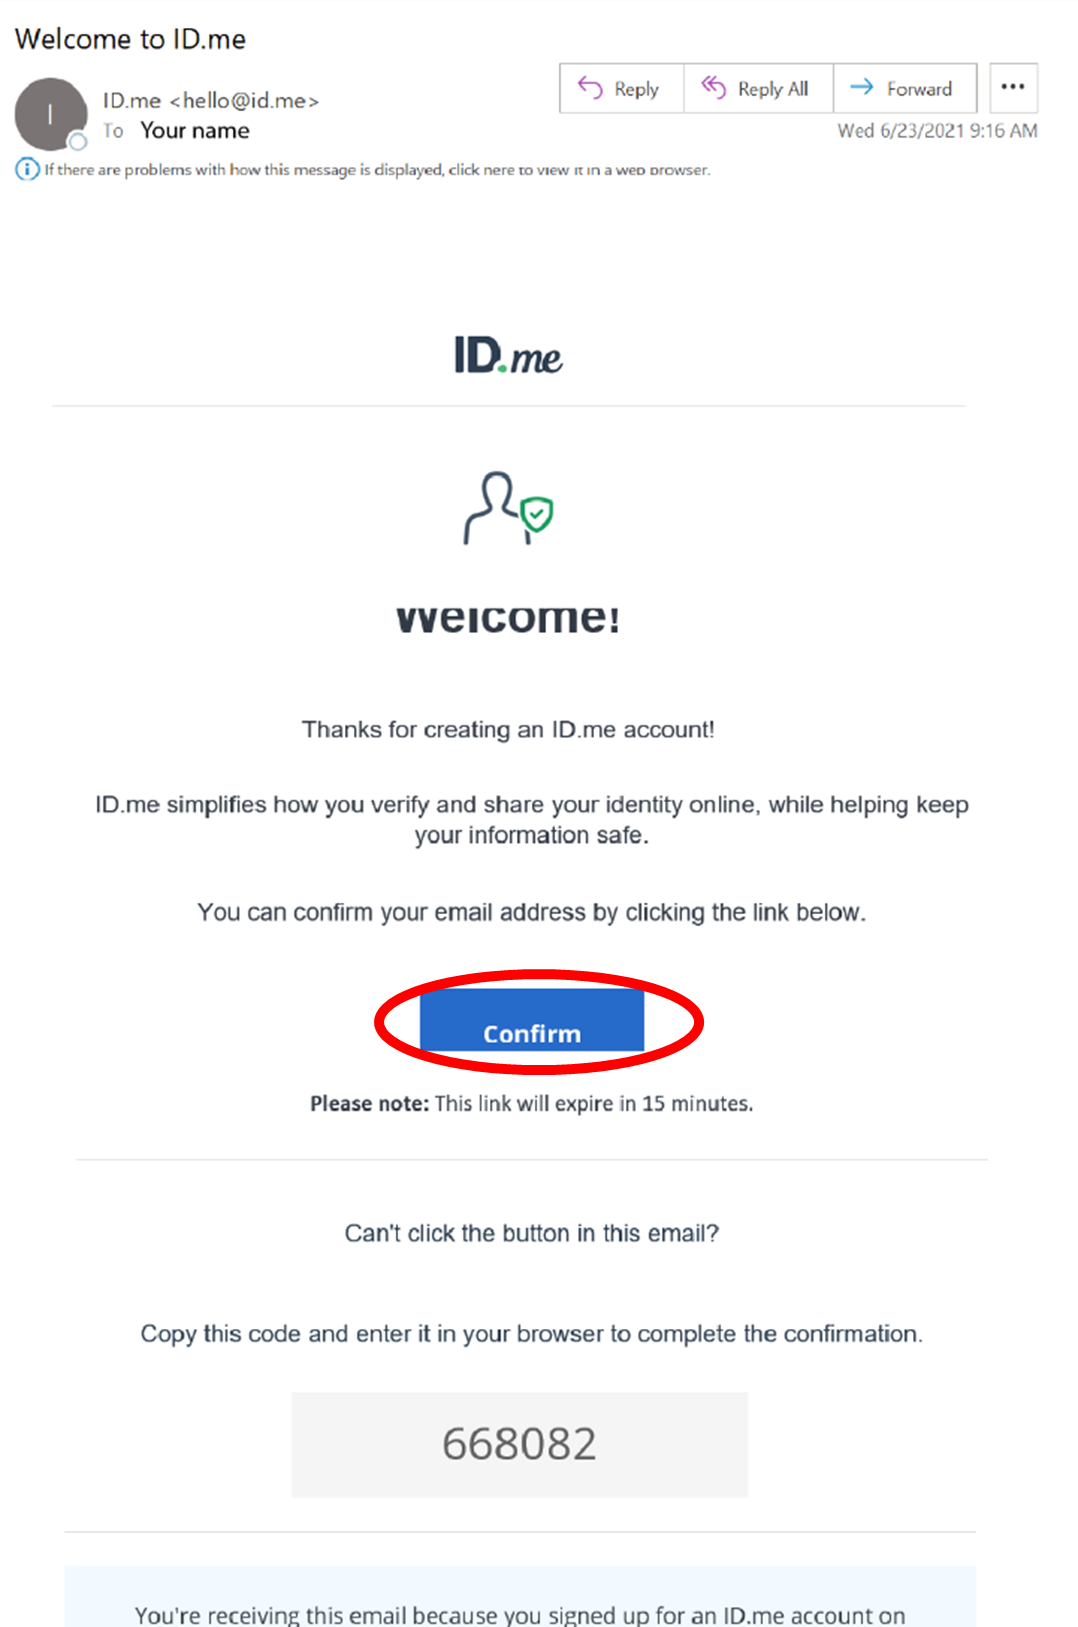
Step 4: Confirm your email address
You will be sent an email from the sender “ID.me” with the subject line “Welcome to ID.me.” Click the blue “Confirm” button to confirm your email address.
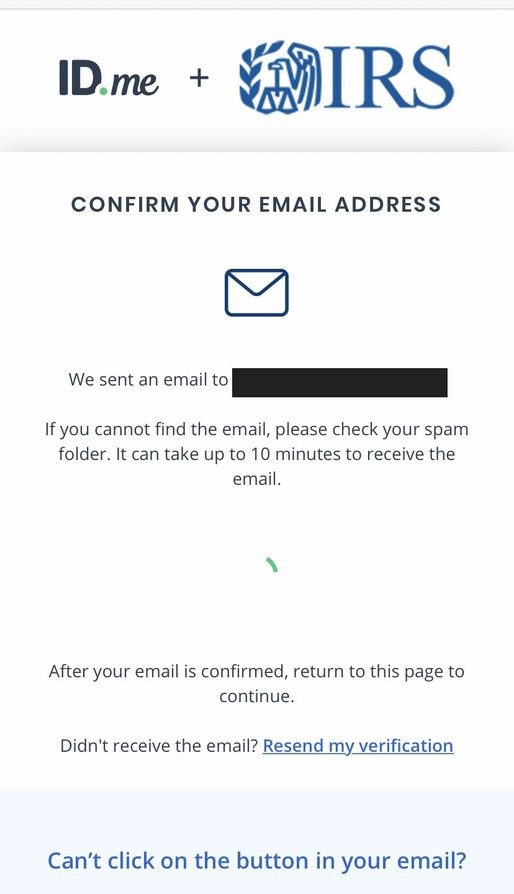
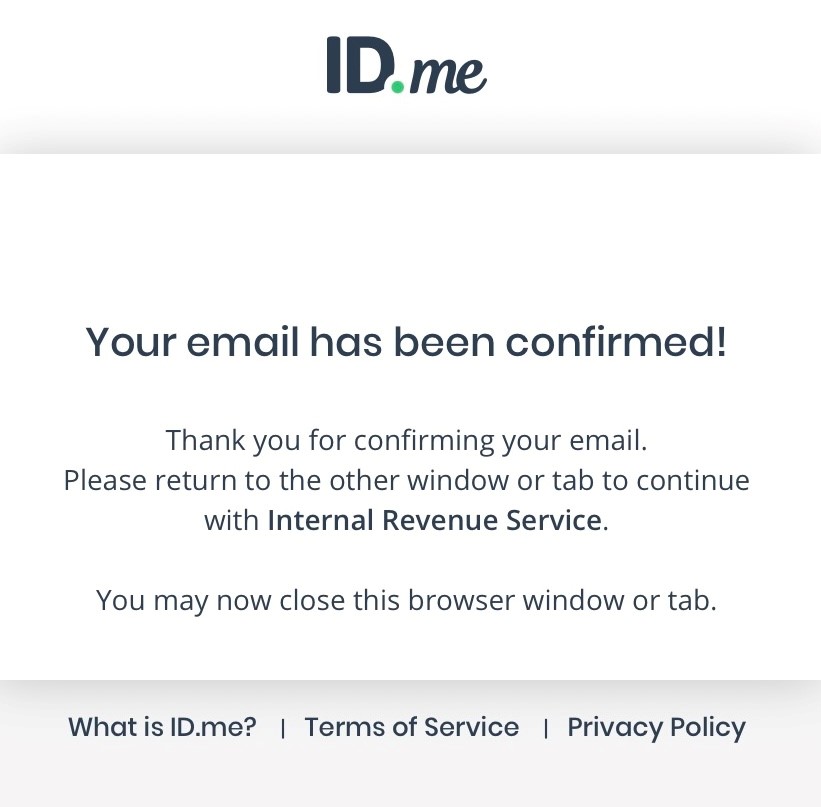
When you see the confirmation screen below, close that tab and click the blue “Continue” button on your previous screen.
Step 5: Secure your account
After clicking the blue “Continue” button, you will be asked to secure your account. There are five options to secure your account.
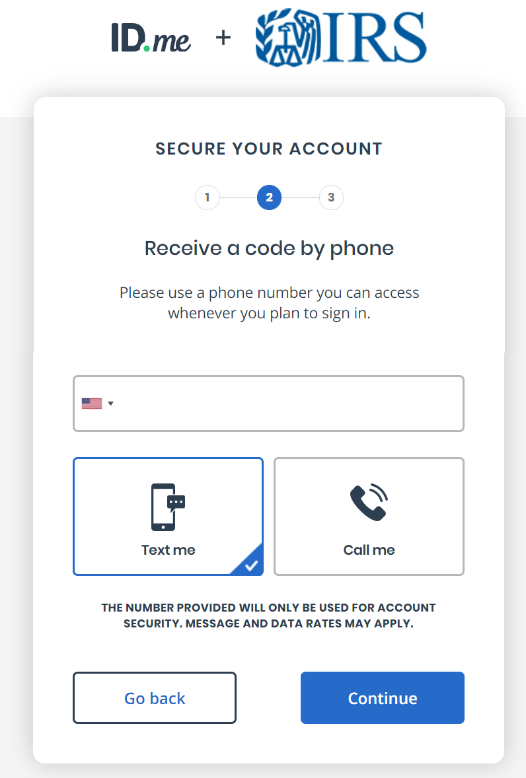
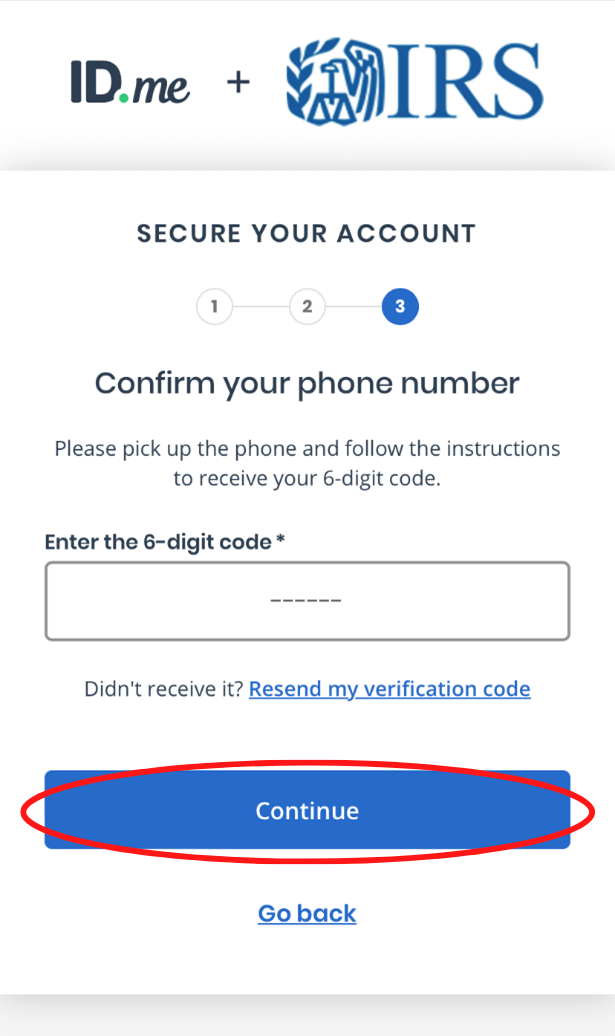
For this guide, to secure your account, we will use the text or phone call option. Press the blue “Select” button for “Text Message or Phone Call.”

Enter your phone number. You can choose whether to receive the security code by text message or phone call.
This guide uses the texting option.

Use the security code sent to your phone to secure your account. You will receive a text message like this on your phone:
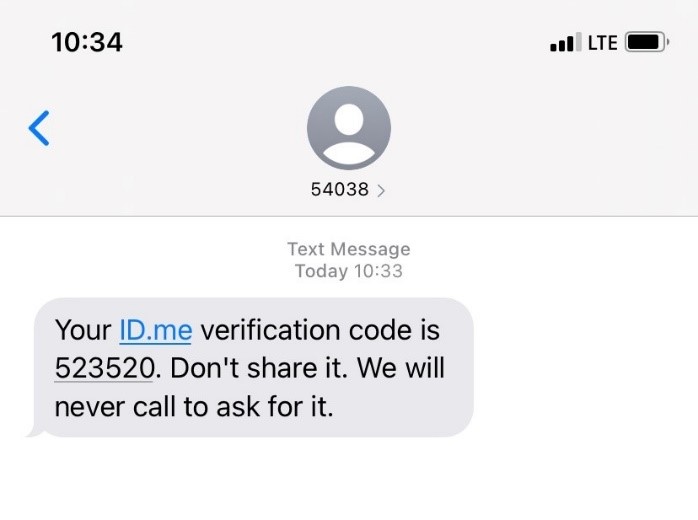
Enter the code in your text message onto the computer screen. Then press the blue “Continue” button. Your account is now secure!
You will be sent an email from the sender “ID.me” with the subject line “You have enabled multi-factor authentication.” The message will look like this:

You can create a recovery code in case you lose access to your phone or computer and can’t receive the code you need to connect you to your account. Click the “generate recovery code” button.
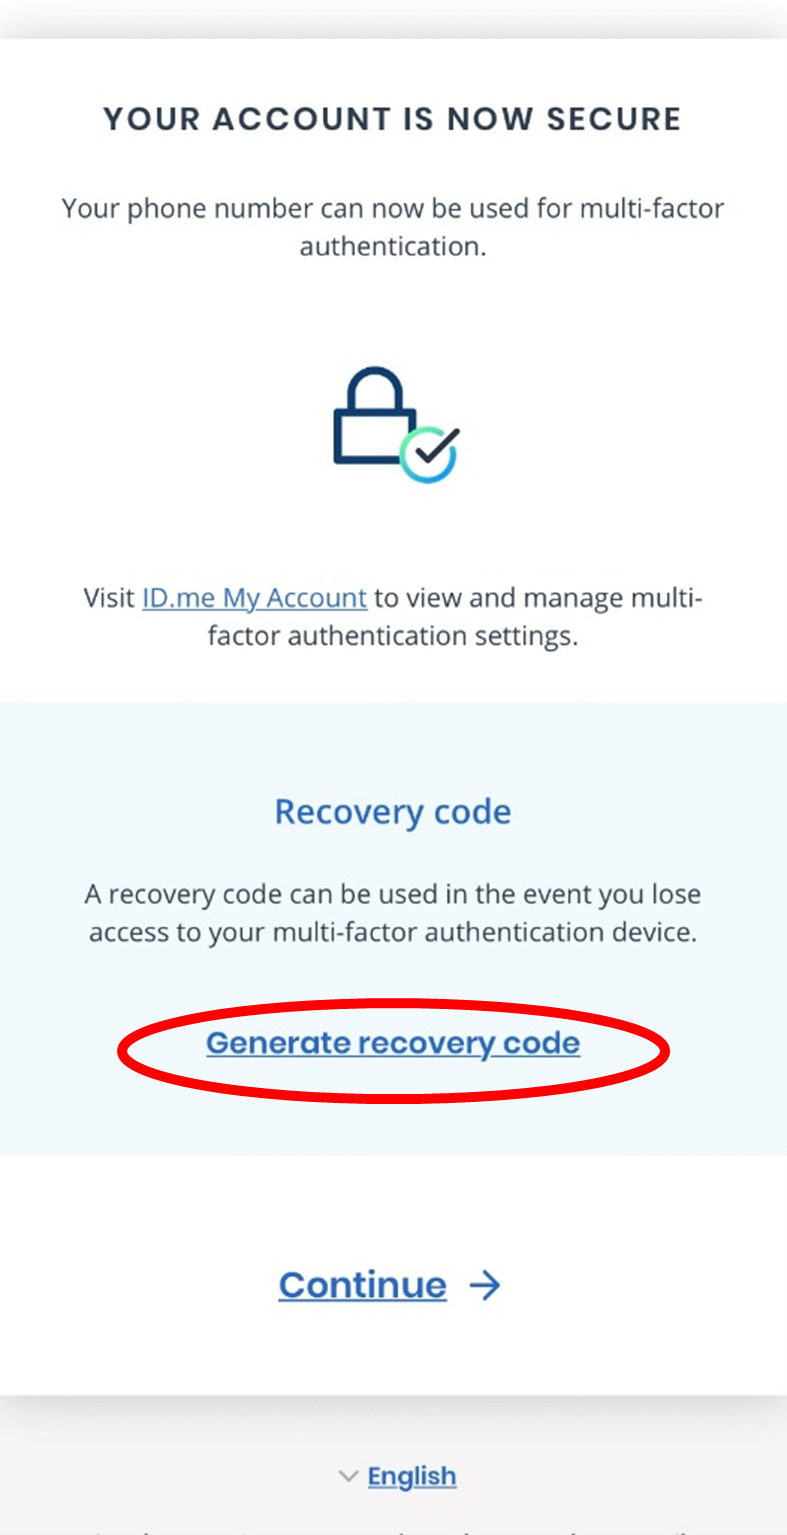
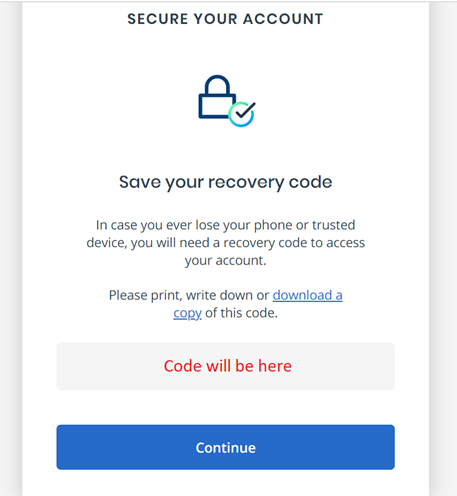
Safely save your recovery code. You will need this to access your IRS account if you lose your phone.
Press the blue “Continue” button to move on to the next step.
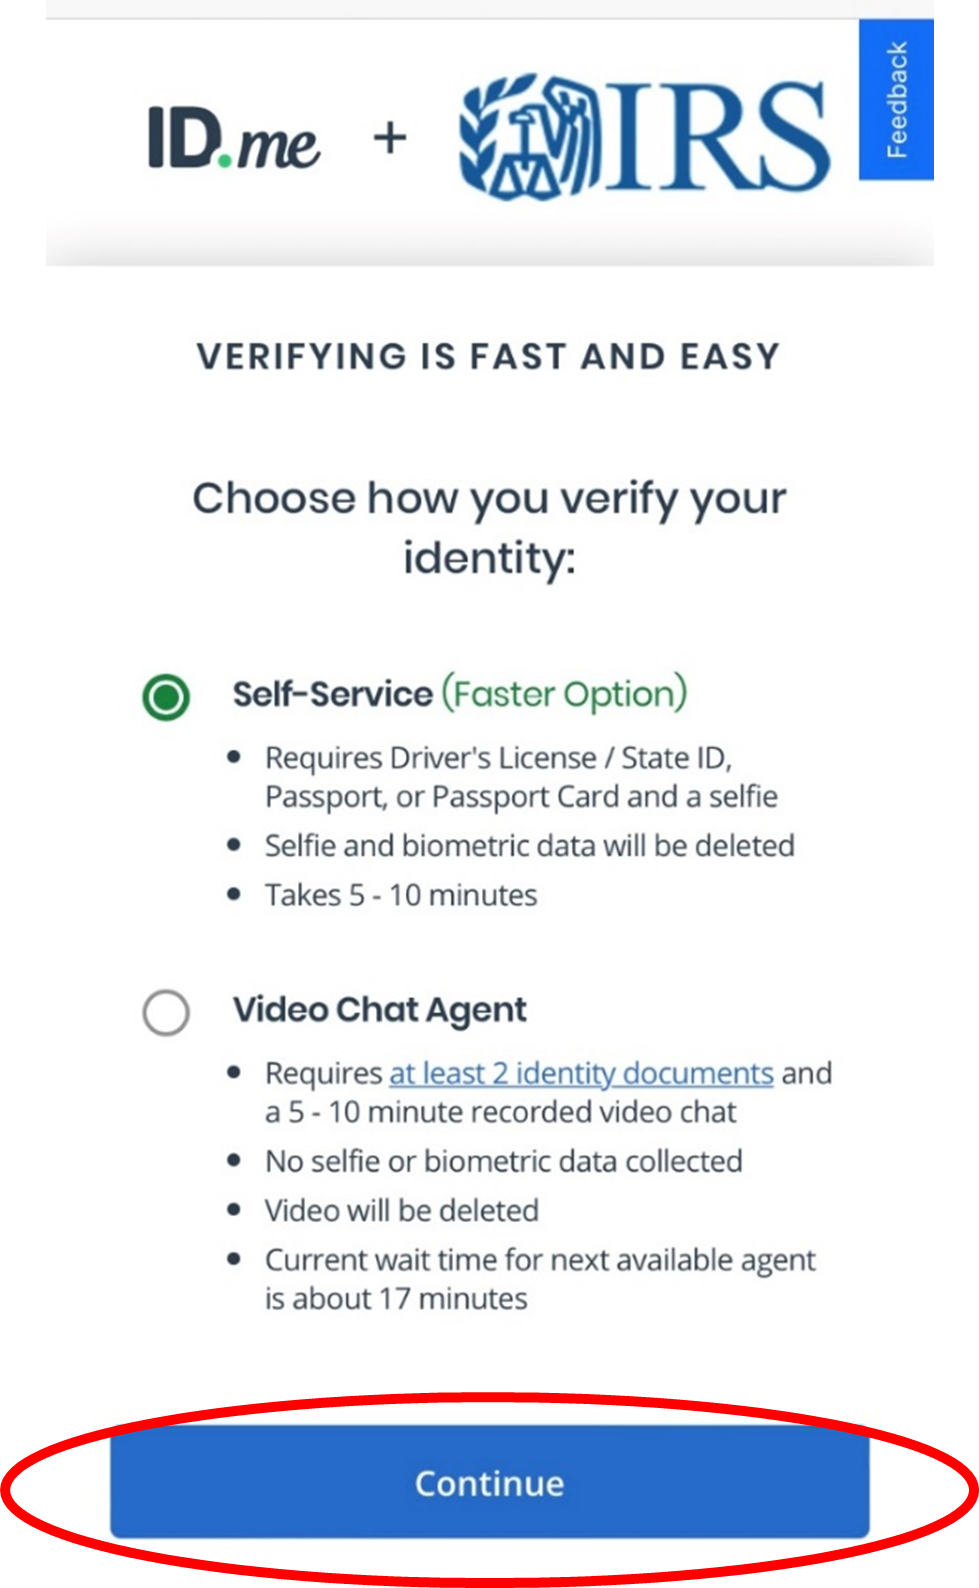
Step 6: Verify your identity
There are two options to verify your identity: self-service or through a video chat agent.
Self-Service:
- Takes 5-10 minutes
- Requires a Social Security number (SSN) and video selfie
- Requires one of the following government-issued photo IDs:
- Driver’s license or
- State ID or
- Passport or
- Passport card
If you don’t have these documents available, select the video chat agent option.
Video Chat Agent:
- Wait time may vary depending on demand.
- Accepts a broader list of identity documents.
- You can use an SSN or Individual Taxpayer Identification Number (ITIN).
- Allows you to speak directly to an ID.me video agent.
- Does not collect a selfie or biometric data.
Note: You cannot use self-service if you have an Individual Taxpayer Identification Number (ITIN). You must use the video chat agent.
For instructions on verifying through a video chat agent, go to “Step 13: Verify your identity with a video chat agent.”
Select “Self-Service” and click the blue “Continue” button.
Next, you will be taken to the Privacy Policy.

Check the box “I acknowledge that I have received, read, and agree to the terms of the ID.me Biometric Information Privacy Policy.” Then click the blue “Continue” button.
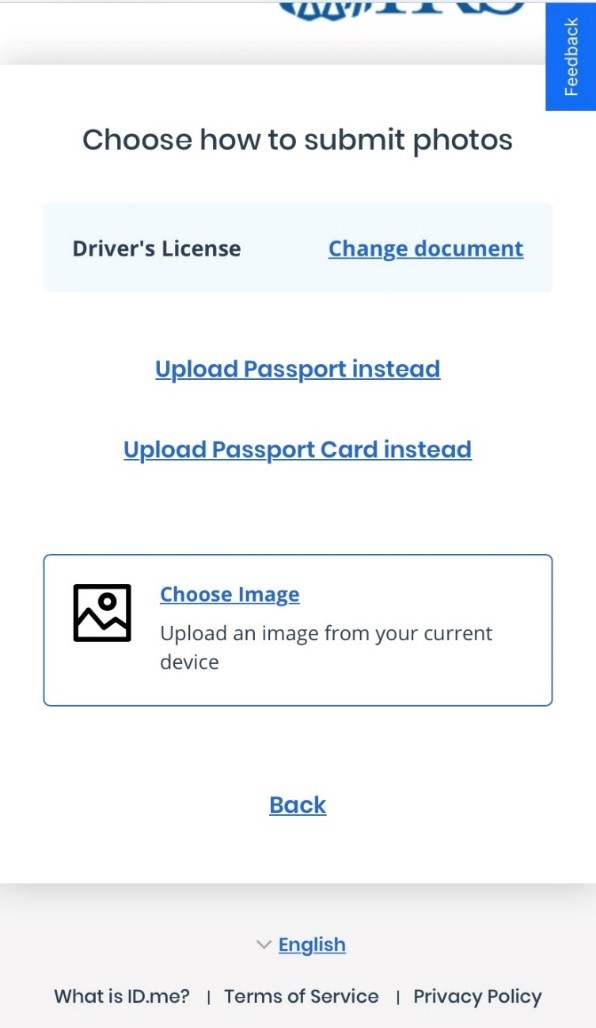
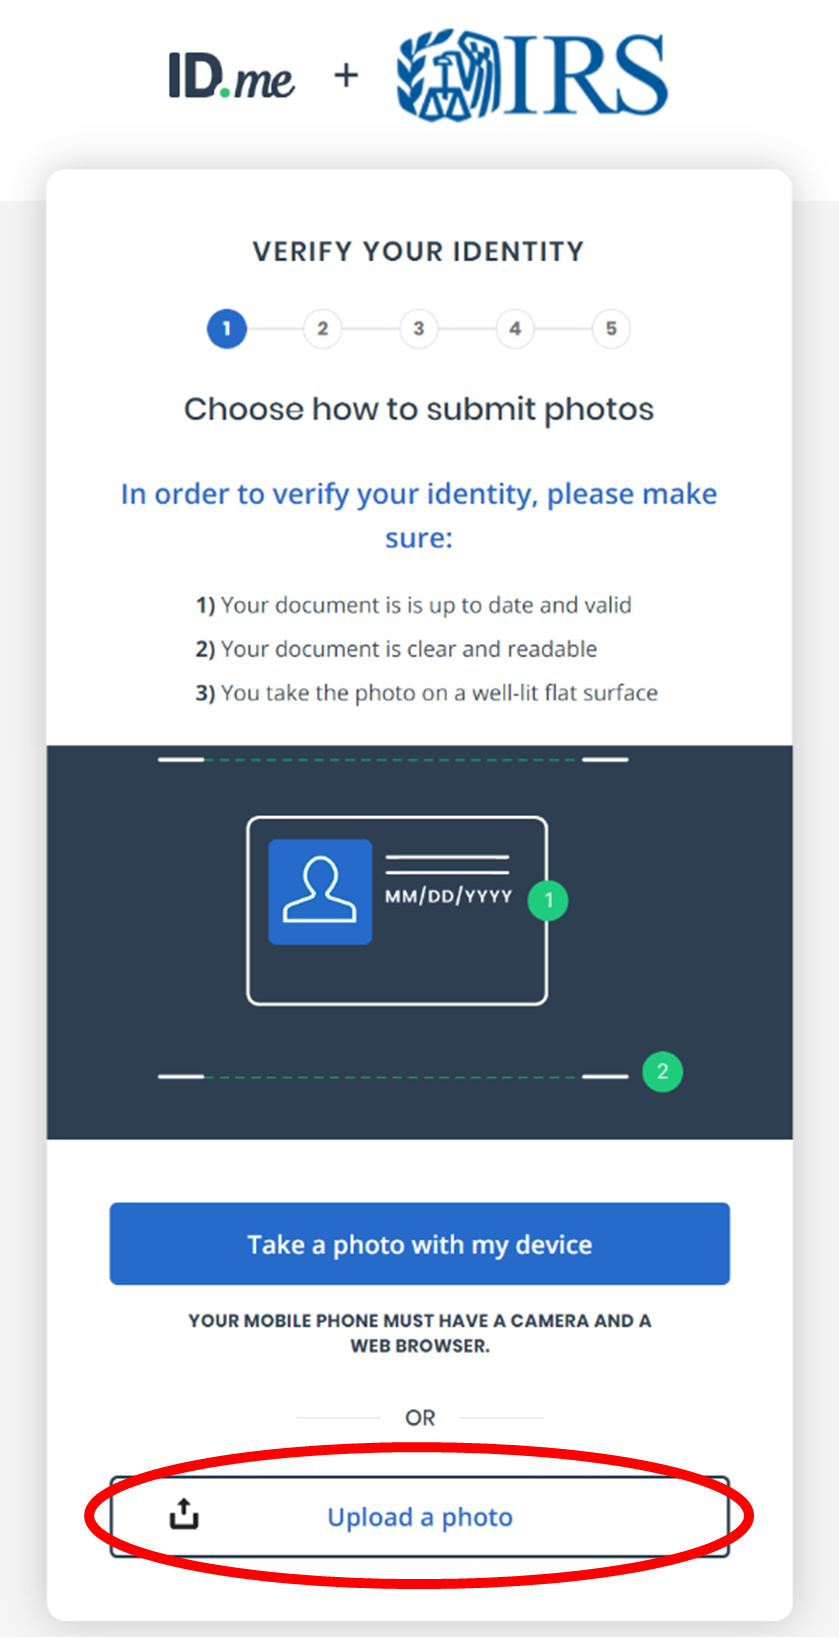
Step 7: Verify your identity by uploading photos of your documents
You have the option to take a photo of your driver’s license, passport, or passport card or upload a photo from your camera roll. This guide will go through the steps to take a new photo first (step 7A), and then the steps to upload a photo (step 7B).
The default document to upload is a driver’s license. If you want to upload photos of your Passport or Passport Card instead, click the text that says, “Change document.”
This guide uses the option to upload photos of your license or state ID.
Step 7A: Take a picture of your document
Click the blue “Take a photo with my device” button.
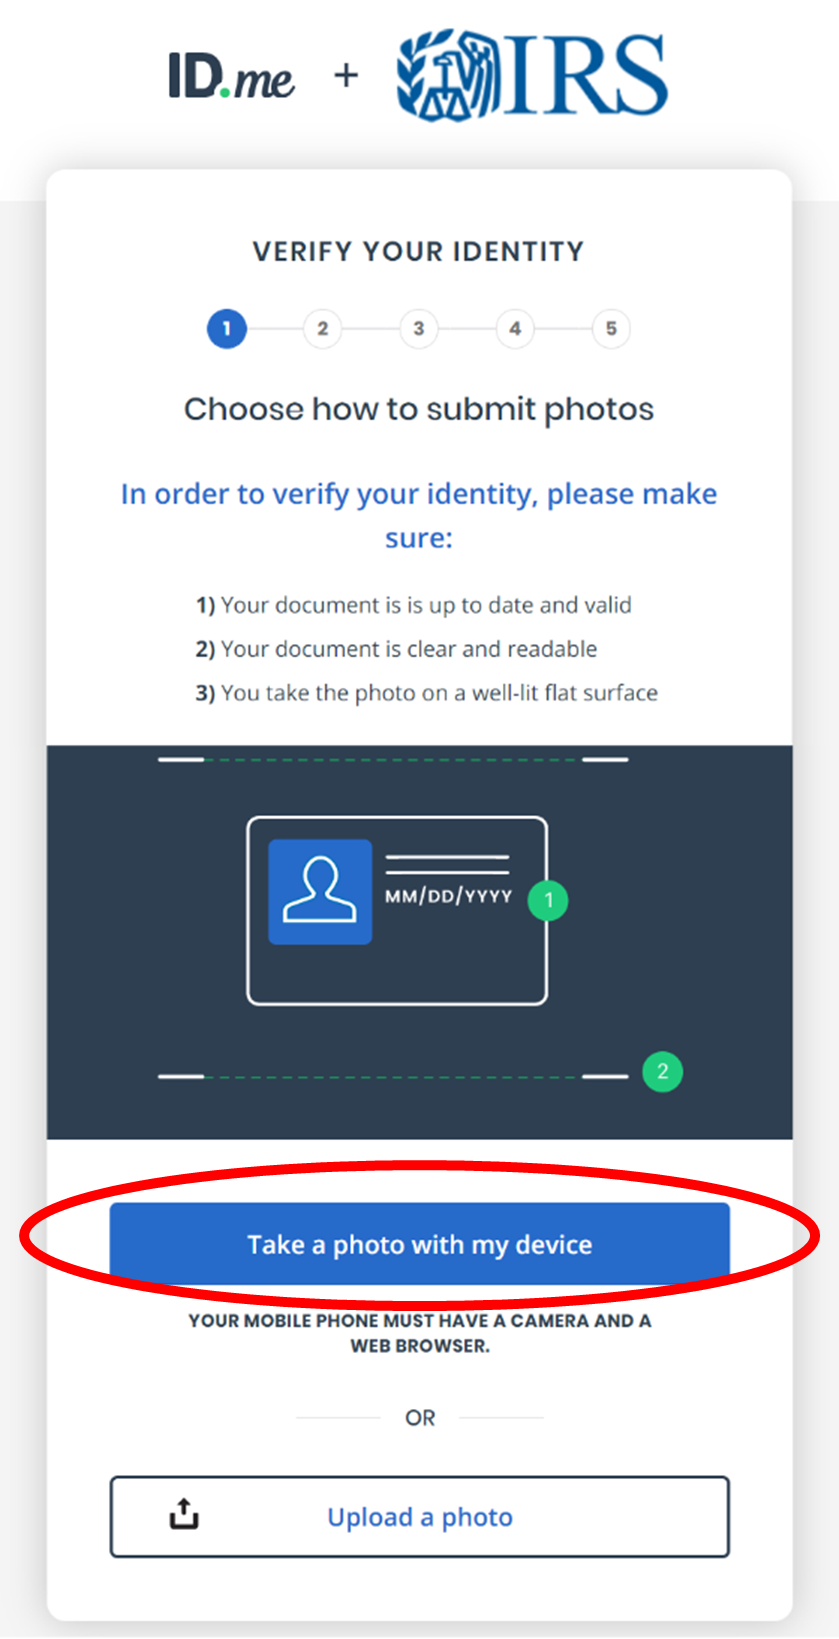
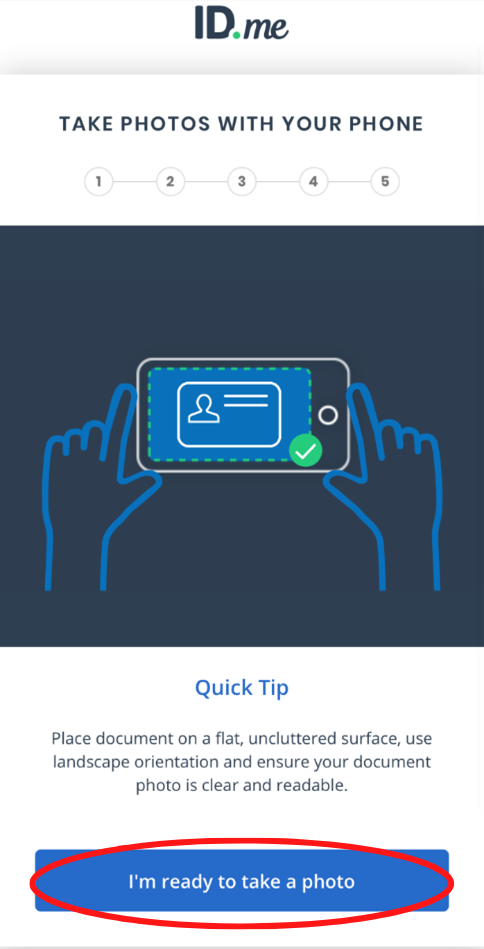
The next screen will ask you to take a picture of your ID. Have your driver’s license or state ID ready to photograph. Click the blue “I’m ready to take a photo” button.
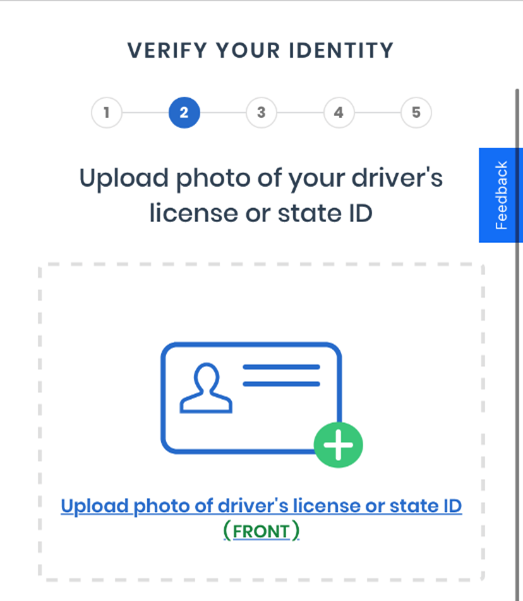
On the next page, click the blue box “Choose photo of your driver’s license or state ID.”
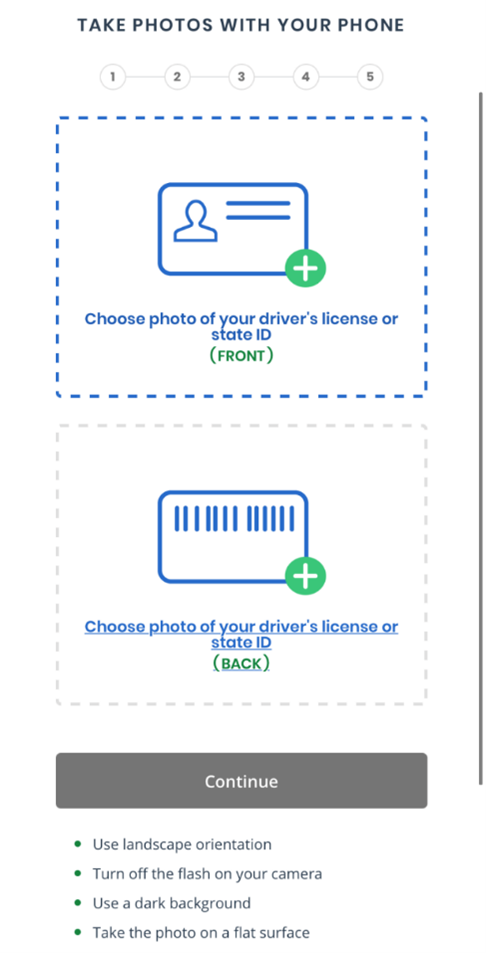
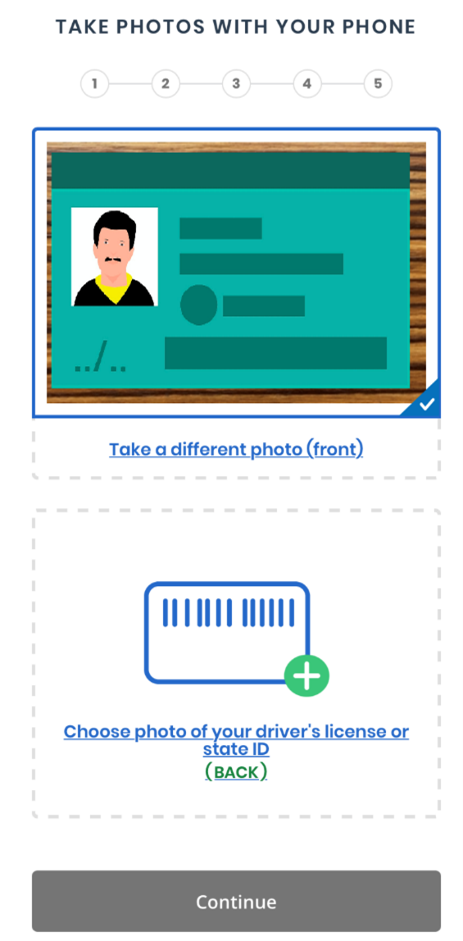
Then, you will be taken to the screen on the left below. Click the blue “Take photo” button to take a photo of the front of your driver’s license or State ID. Use your phone camera and point it towards the front of your driver’s license or state ID. When the frame turns green, tap your screen to take the photo.


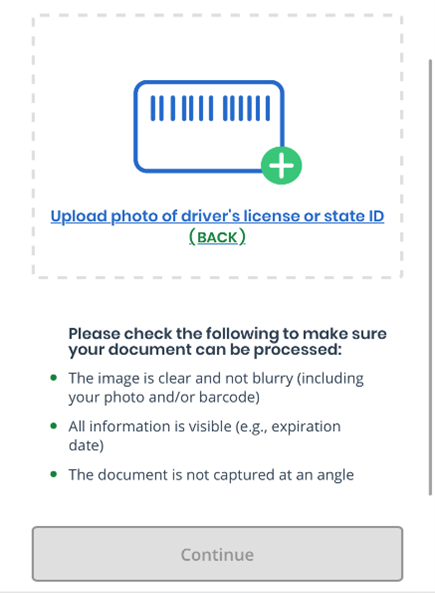
After the front of your driver’s license or state ID is taken, you will return to the previous page on your phone. A photo of the front of your driver’s license will appear in the top box.
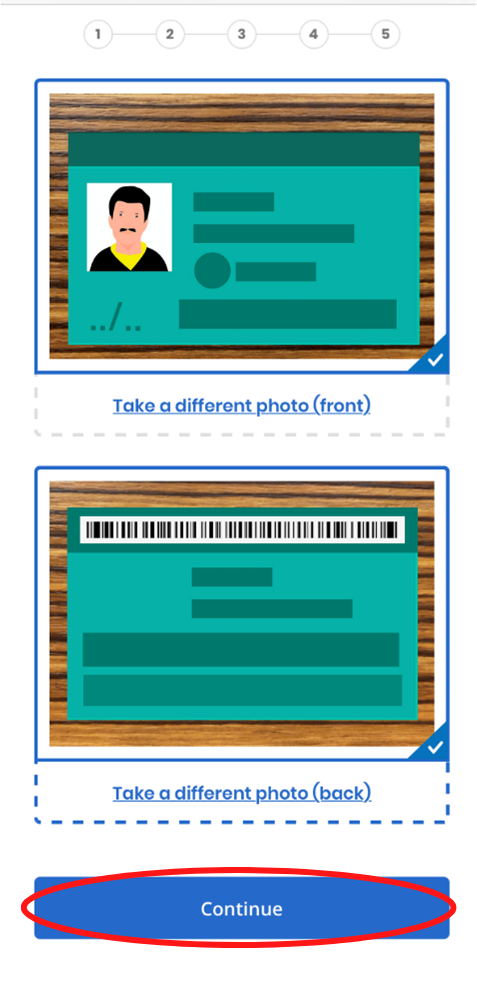
Repeat the same steps to take a photo of the back of your driver’s license or state ID. After you have taken a photo of both the front and back side, both boxes should show photos of your driver’s license or state ID.
Press the blue “Continue” button on your phone.
You will be taken to this page on your phone:
Step 7B: Upload a picture of your document
Click the white “upload a photo” button.
You will be taken to a page asking you to upload a picture of your ID. Click on the blue “upload photo of driver’s license or state ID” text to upload a photo of the FRONT of your driver’s license.
You will be taken to the page below. Click the blue “Choose photo” button and select the photo of your ID. Press “Continue.”

You will be taken back to the previous page to upload the photo of the BACK of your driver’s license. Repeat the step above again.
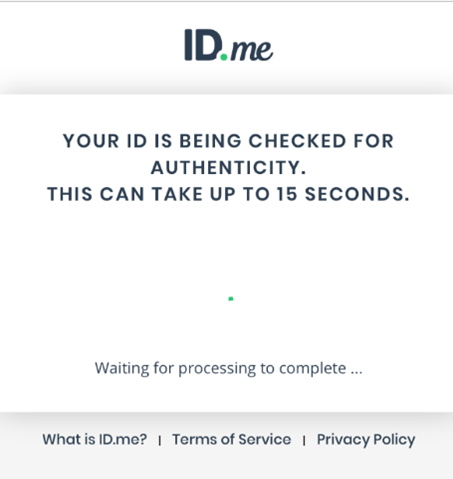
Once your photos are uploaded and submitted, you will be taken to this page:
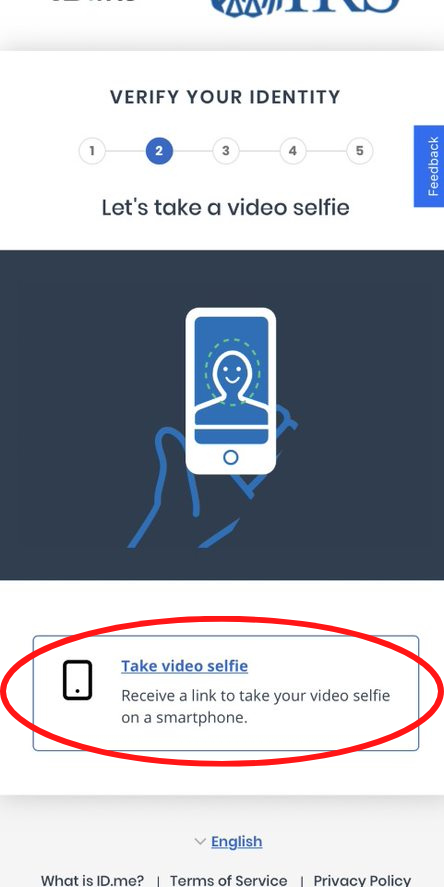
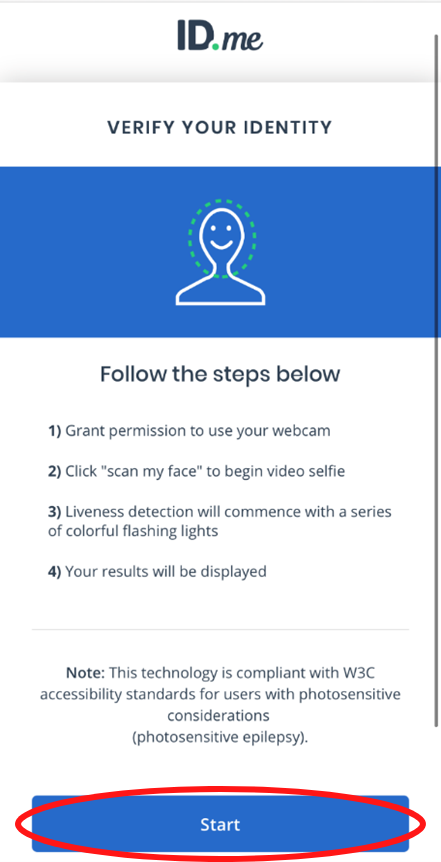
Step 8: Use your phone camera to take a video selfie
You will need to verify your identity by using your phone camera to scan your face during a short video. Click the “Take video selfie” button to get started.
When you’re ready, click the blue “Start” button and then the blue “Scan my face” button. Click “Allow” when the page asks to access your camera.
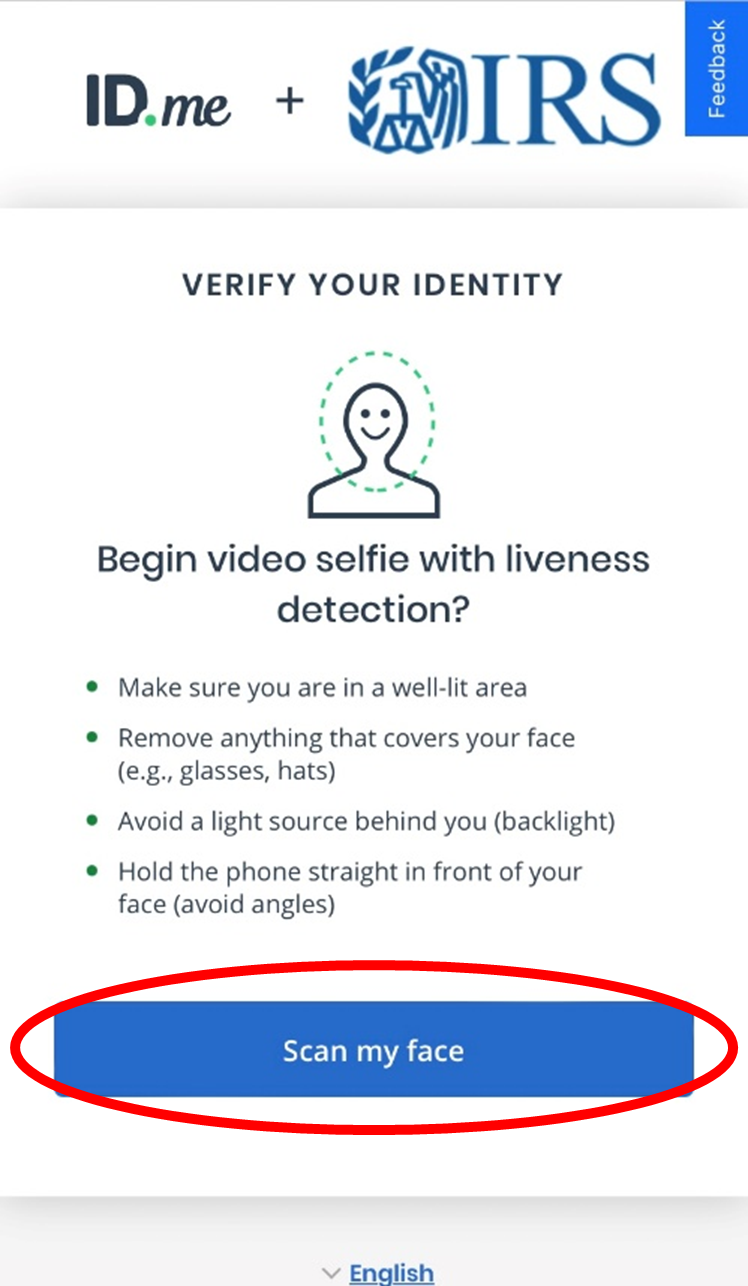
On your phone, you will be taken to this page where the scan will take place.
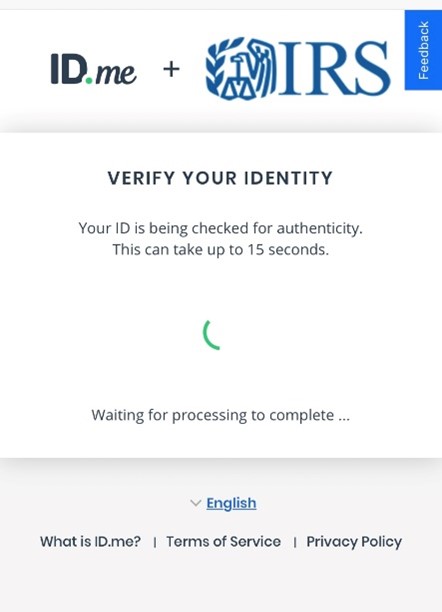
The scan will be a short video with several colorful flashing lights. Make sure there is good lighting and your face and head are uncovered to match how you appear on your ID. Stay still and wait for the video to complete. ID.me will then process your selfie.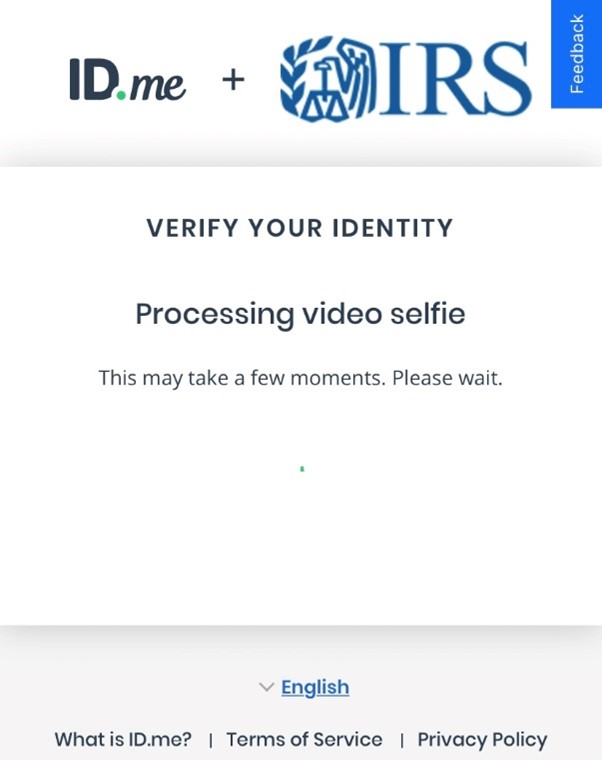
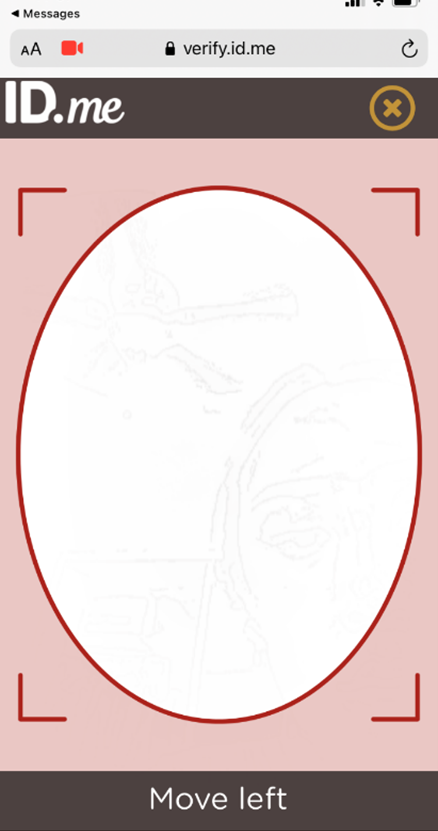
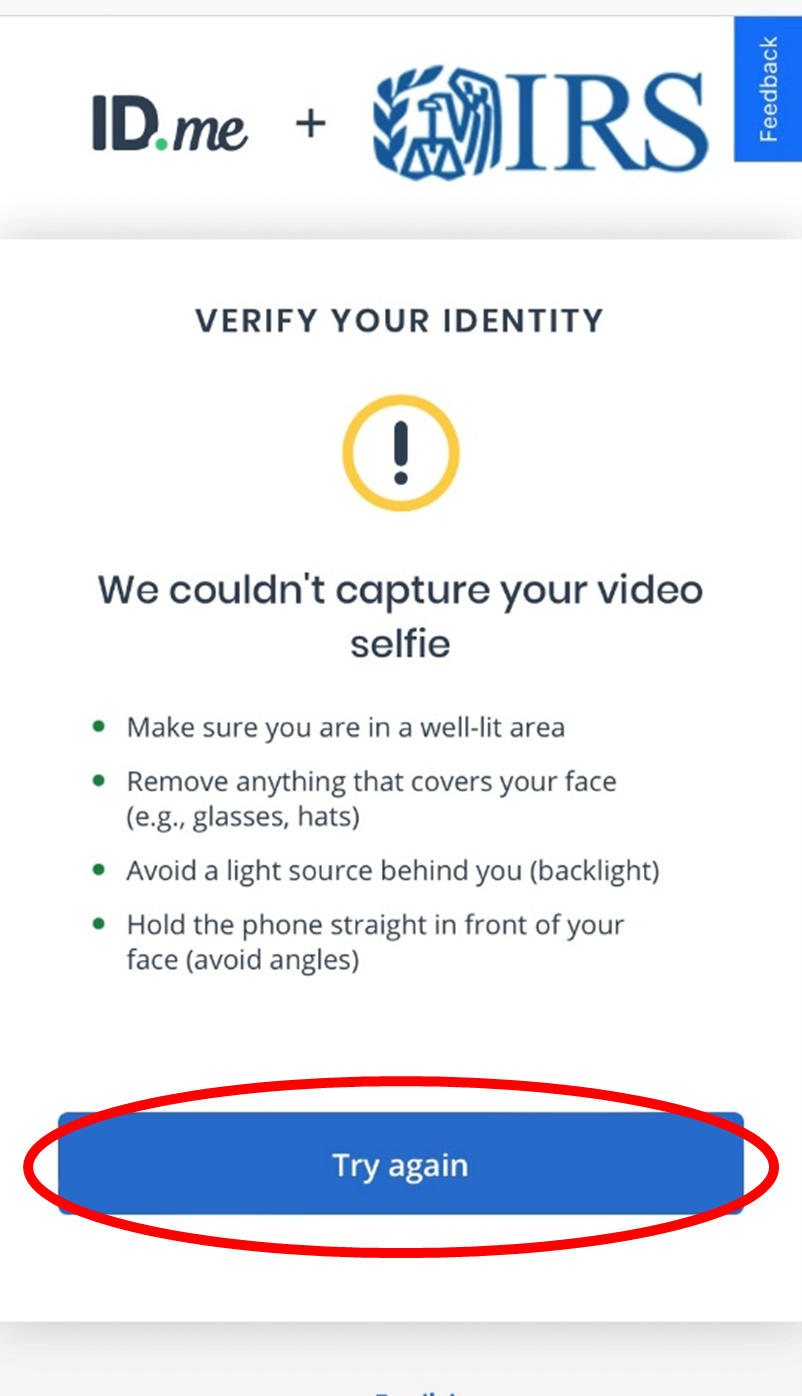
If you receive an error message like the one below, it’s okay. Click the blue “Try again” button. Check to make sure you have good lighting to brighten your face and make sure to hold your phone camera straight in front of you with your face filling the entire oval.
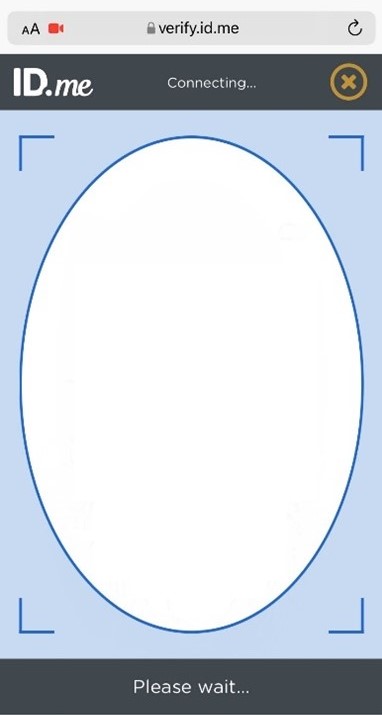
Once you have successfully completed the video selfie, you will be taken to this page:
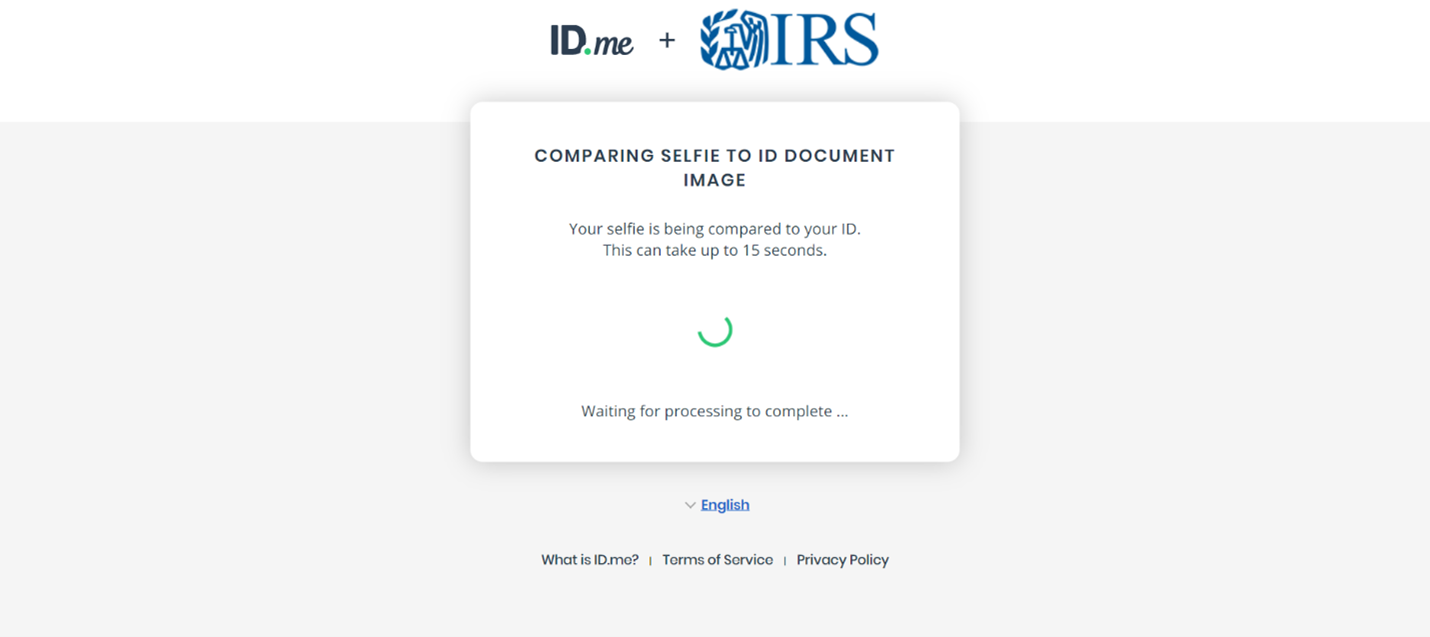
Step 9: Enter your Social Security number
Once ID.me finishes comparing your face scan to your driver’s license or state ID, you will be taken to this page where you need to enter your SSN. This is safe to do and is needed to verify your identity. ID.me uses encryption to protect your information.
Click the blue “Continue” button once you have entered your SSN.

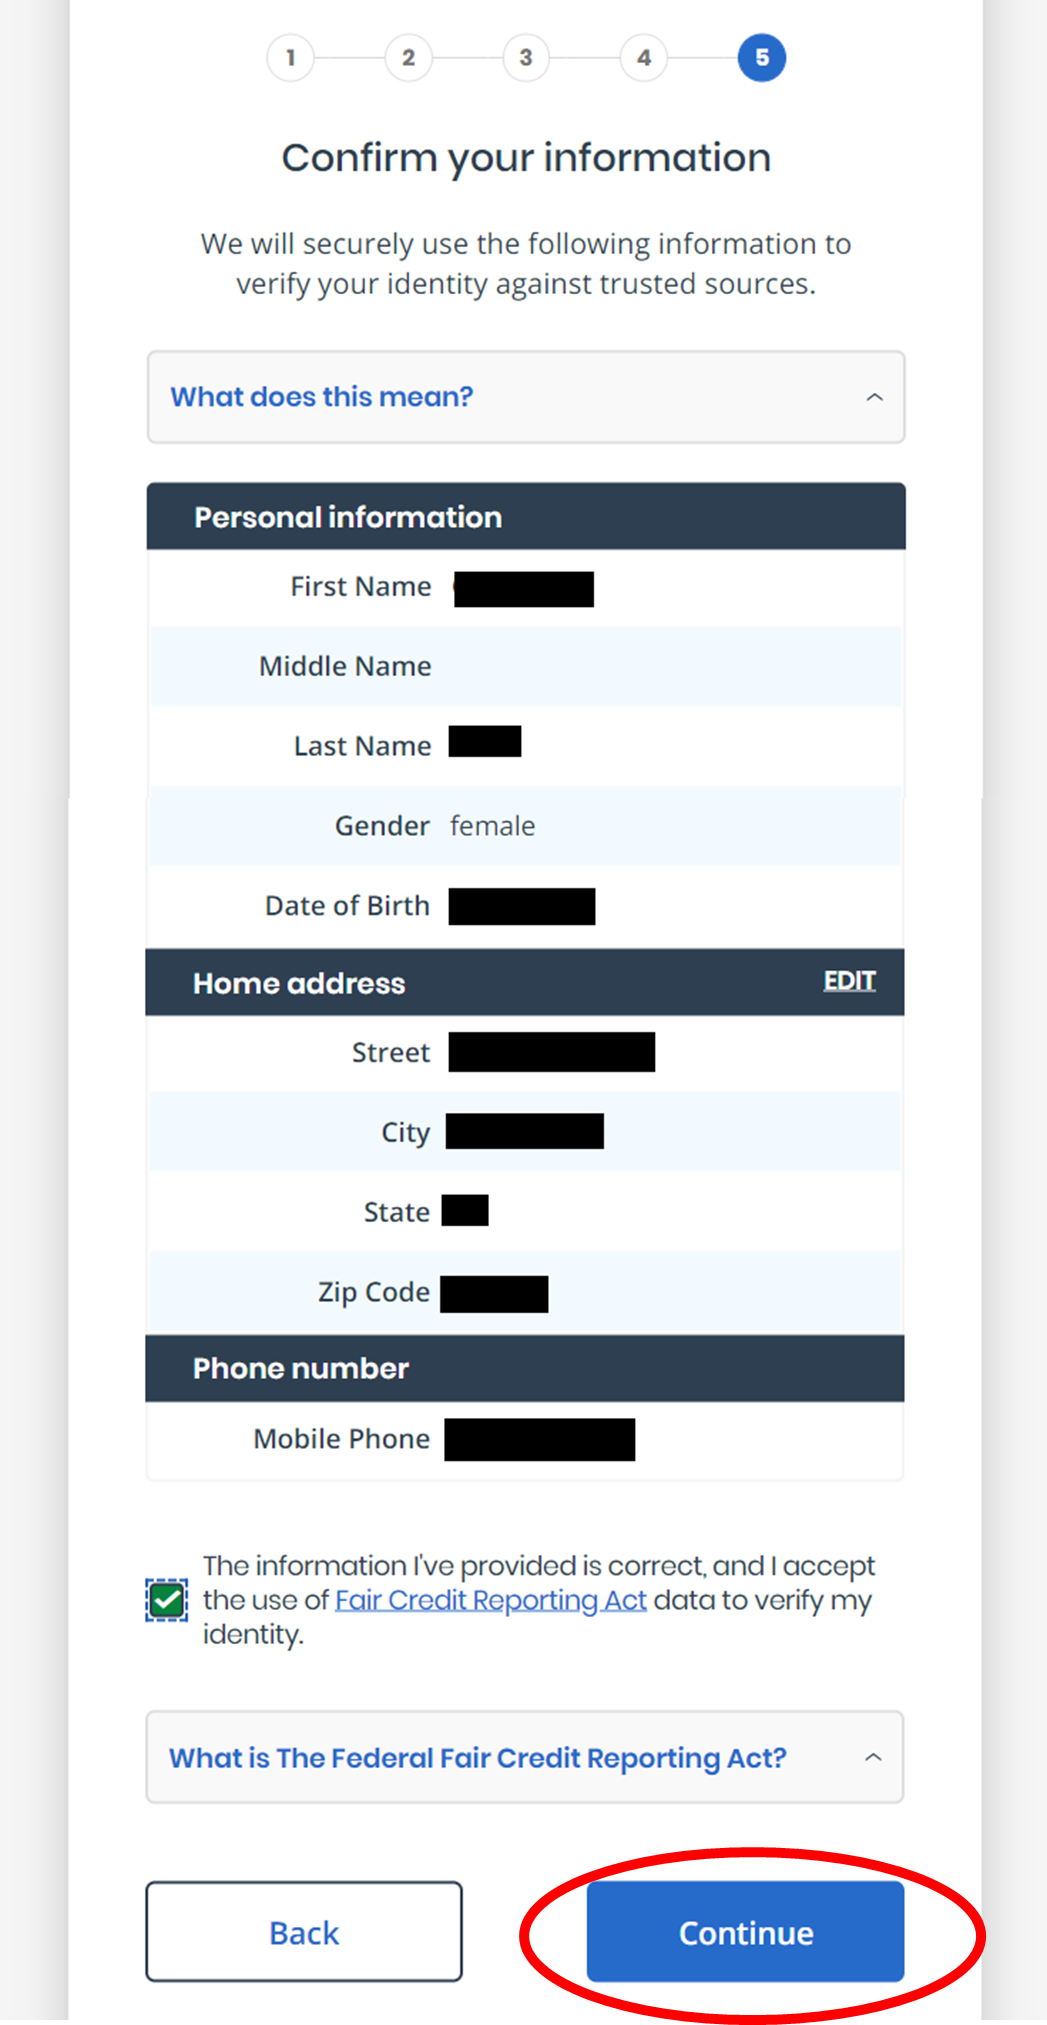
Step 10: Review your information
Next, you will be taken to a confirmation page. Check that your information on the screen matches what is printed on the identification you uploaded.
Once you have reviewed your information and made any necessary changes, check the box “The information I’ve provide is correct, and I accept the use of Fair Credit Reporting Act data to verify my identity.” Then, press the blue “Continue” button.
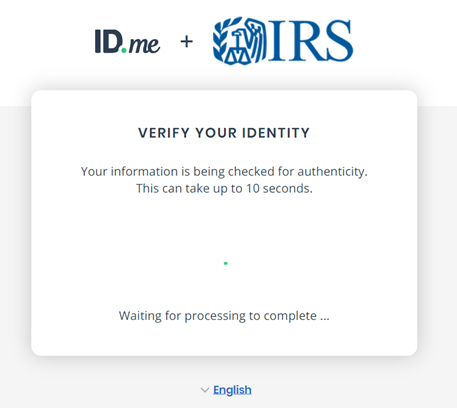
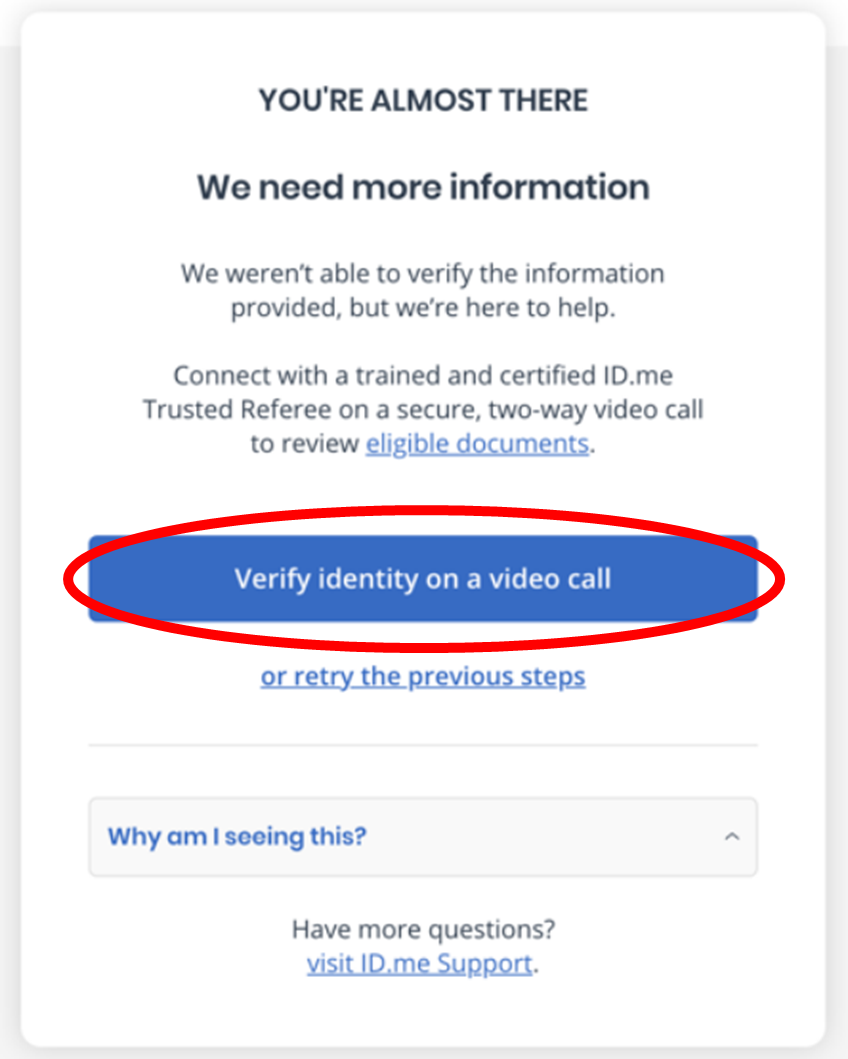
You will be taken to a page that says, “Verify Your Identity.”
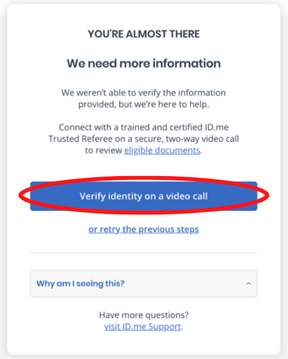
If you see the message below that says, “We need more information” it’s okay. Click the blue “Verify identity on a video call” and skip to step 13 in this guide.
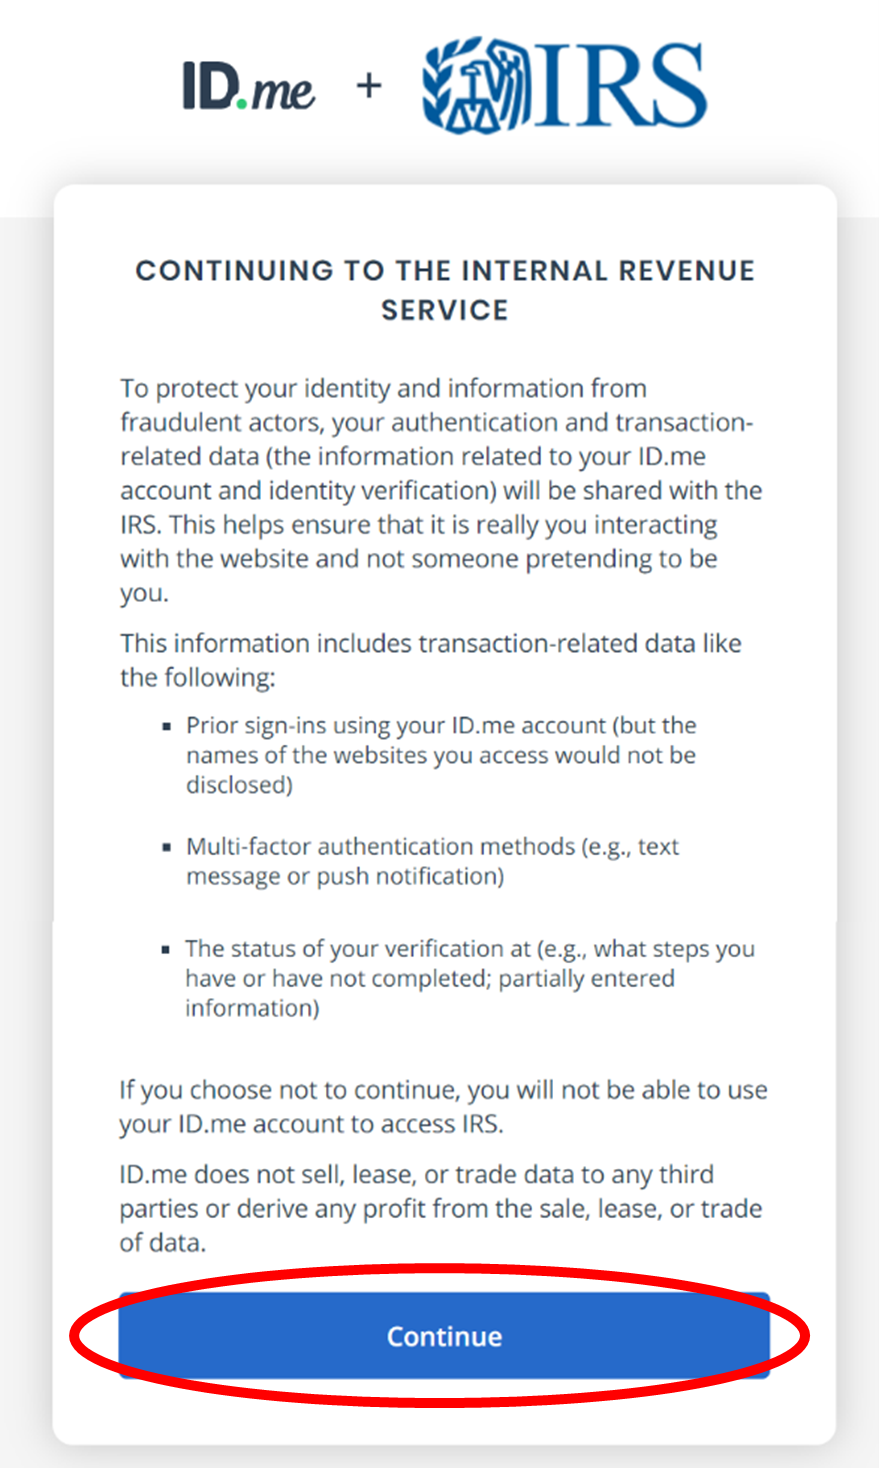
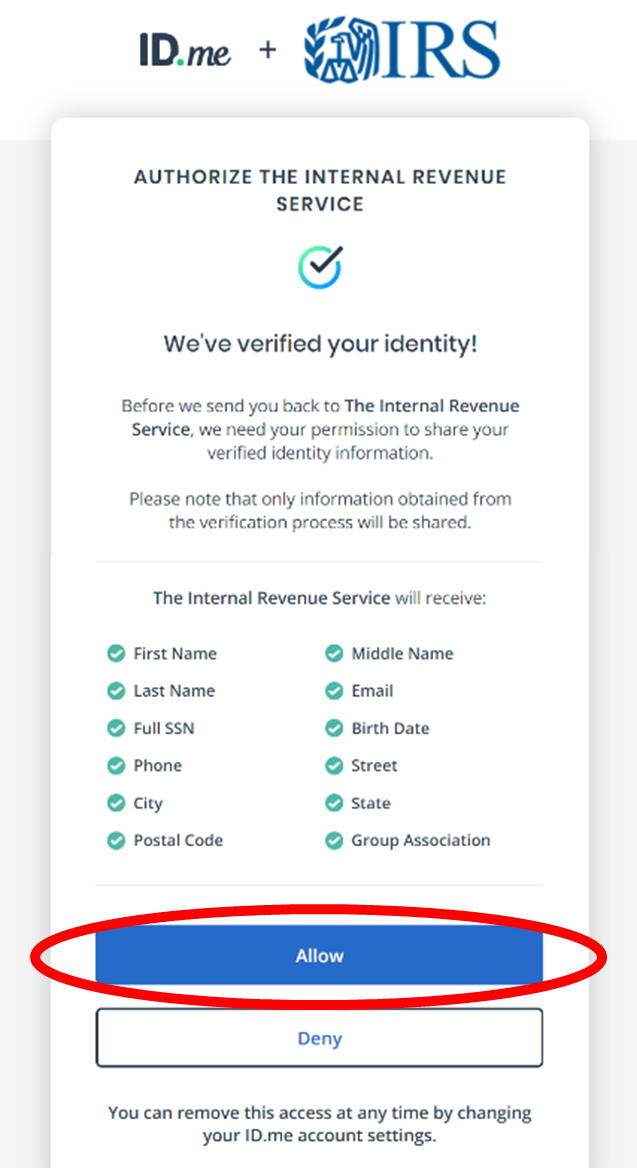
Step 11: Allow ID.me to share your verified identity information with the IRS
When your identity is successfully verified, you will see this confirmation page. Click the blue “Allow” button to let ID.me to share your verified identity information with the IRS. You can withdraw consent of sharing your verified identity information by changing your ID.me account settings.
After hitting the “Allow” button, you will see a notice asking you to confirm that you want to continue. It provides a warning about some of the things people who pretend that they work with the IRS may do.
After you’ve read the fraud awareness notice, enter your email address again to finish the verification process. 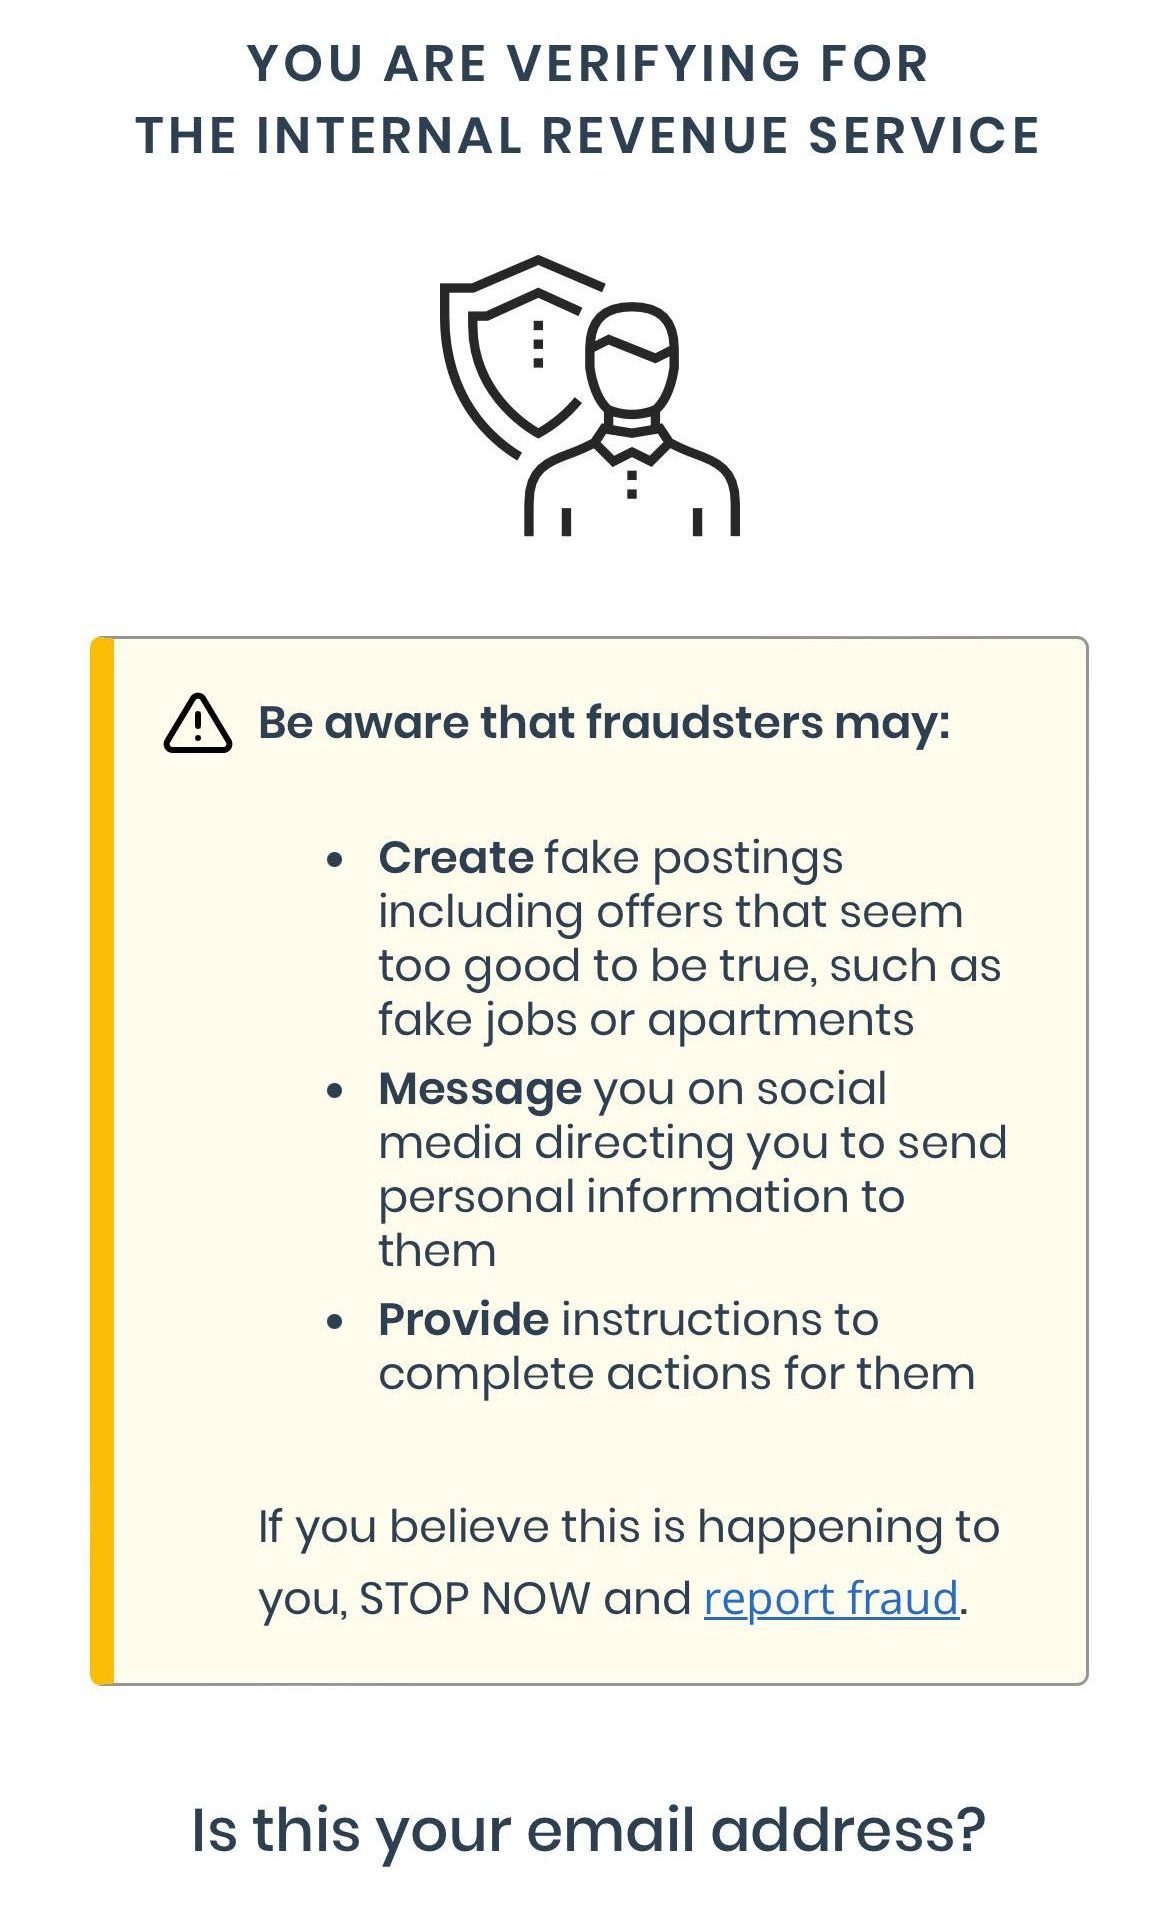
Step 12: Receive confirmation of your completed identity verification process!
You will be sent an email from the sender “ID.me” with the subject line “You have completed your identity verification”. The message will look like this:
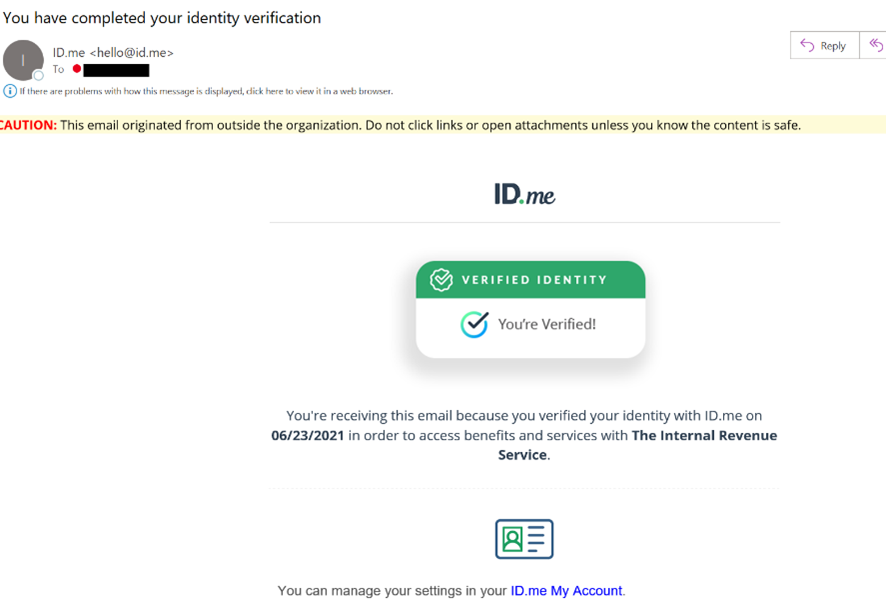
Success! You are now ready to log in through the IRS Sign-In Webpage. Click the green button to sign in with your ID.me account.
Step 13: Verify your identity with a video chat agent
If you see the message below after trying to verify your identity through self-service, you will need to verify your identity on a video call with an ID.me agent. You can also use the video chat agent option if you don’t want to or cannot take a selfie, or if you don’t have one of the required forms of identification.
The video chat agent is a trained identity specialist who works with ID.me to prove your identity. If you are asked to use a video chat agent after trying to use self-service, click the blue “verify identity on a video call” button to connect with a video agent.”
You will be taken to the page below with instructions. Or, if you choose to use the video chat agent option from the beginning, you will be taken to this screen. Click the blue “Get started” button when you are ready to begin.

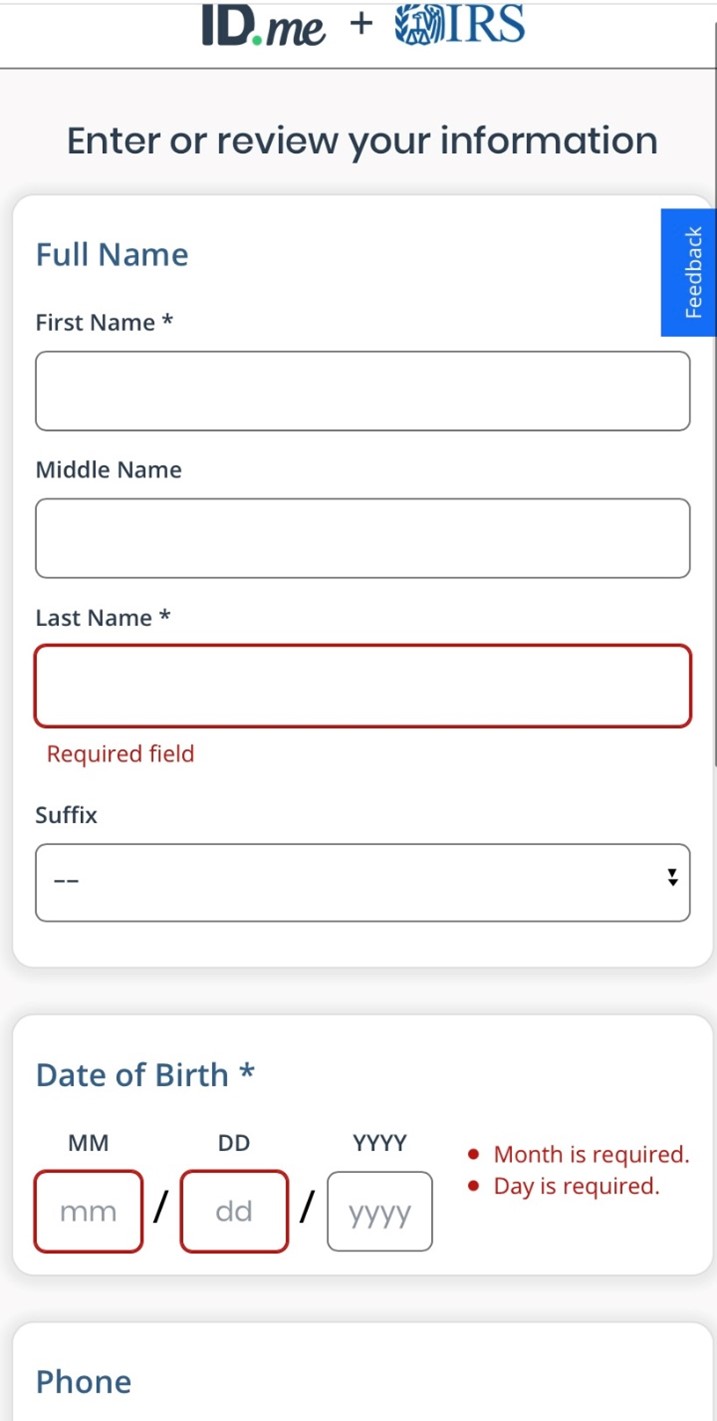
Step 13A: Enter or review your personal information
Step 13B: Enter your Social Security number (or ITIN)
If you are using an Individual Taxpayer Identification Number (ITIN), click the text that says, “Continue by entering your Individual Taxpayer Identification Number (ITIN).”
ID.me uses encryption to protect your information.

Your information will be reviewed, and you will be taken to the next page.
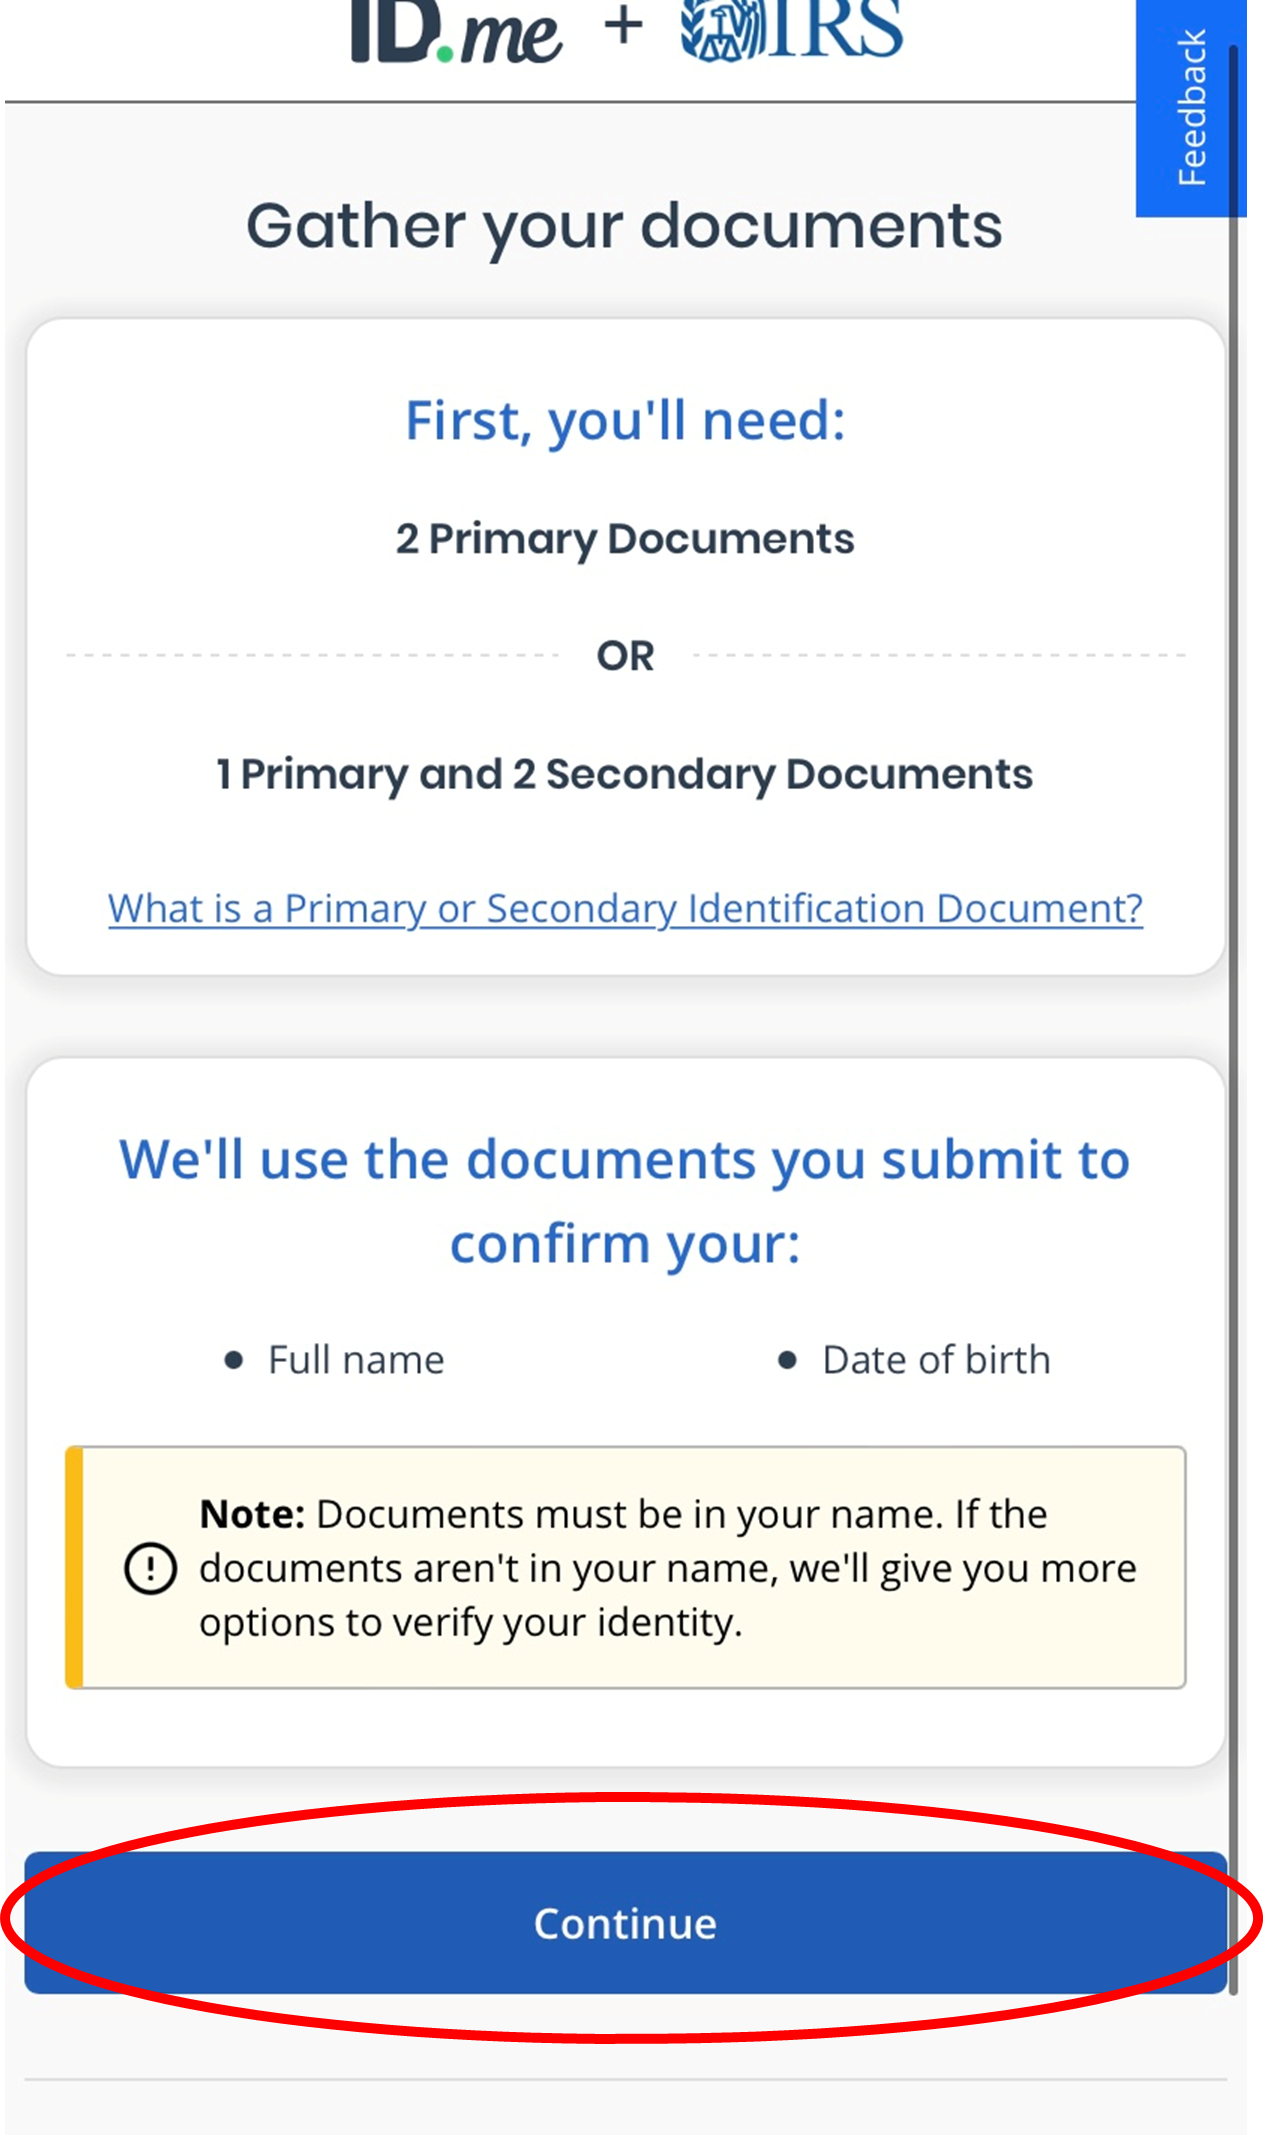
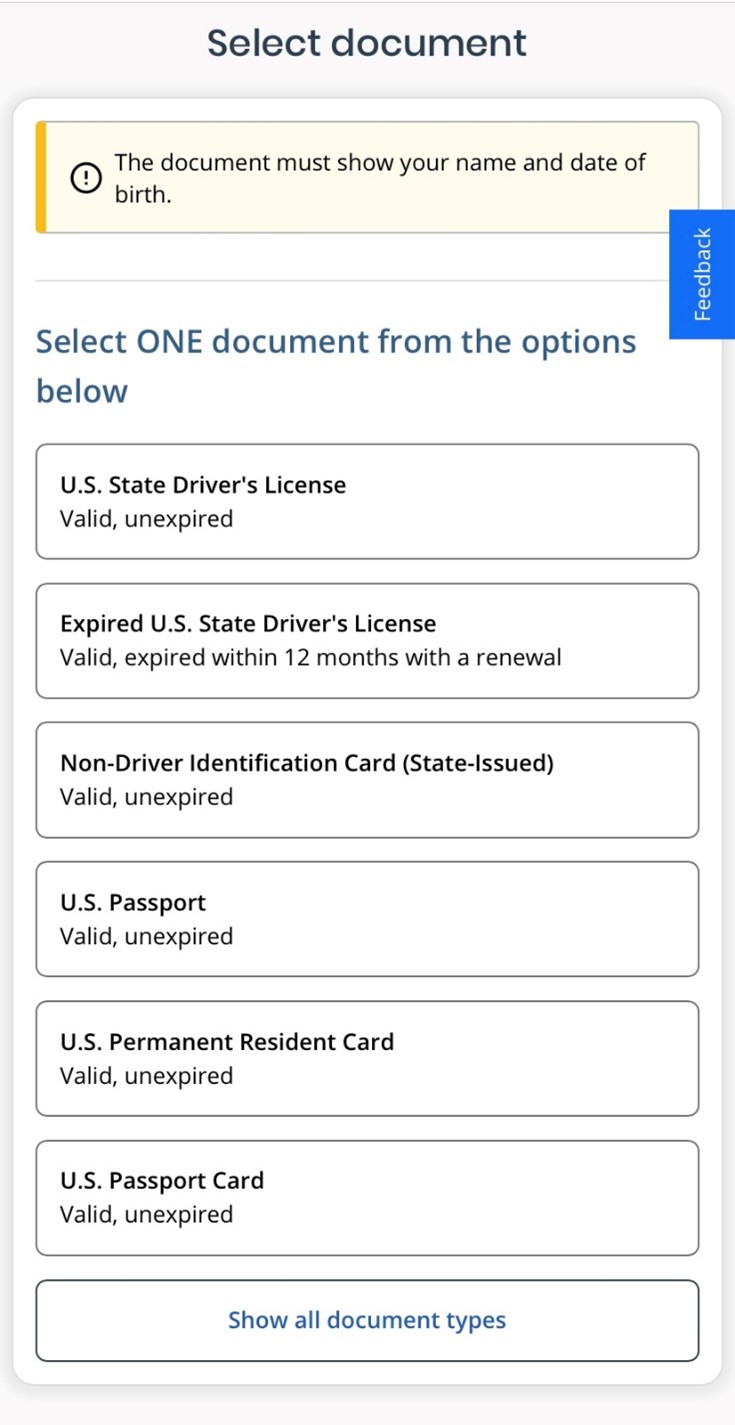
Step 13C: Gather your identity documents
You can use either:
- 2 Primary Documents OR
- 1 Primary Document AND 2 Secondary Documents
The identity documents must be in your name and the primary documents must be physically presented on the call with the video chat agent.
Here is the list of acceptable primary and secondary documents that you can use. If you use a secondary document, make sure that you have the document scanned in the correct color.
Click the blue “Continue” button when you are ready to upload your documents.
Step 13D: Upload your documents for review
View the list of acceptable documents and click on the type of document you want to upload first. If you do not already have photos of your documents saved on your device, we recommend you take pictures before completing the next steps. You will have to upload photos of your documents from your device’s camera roll.
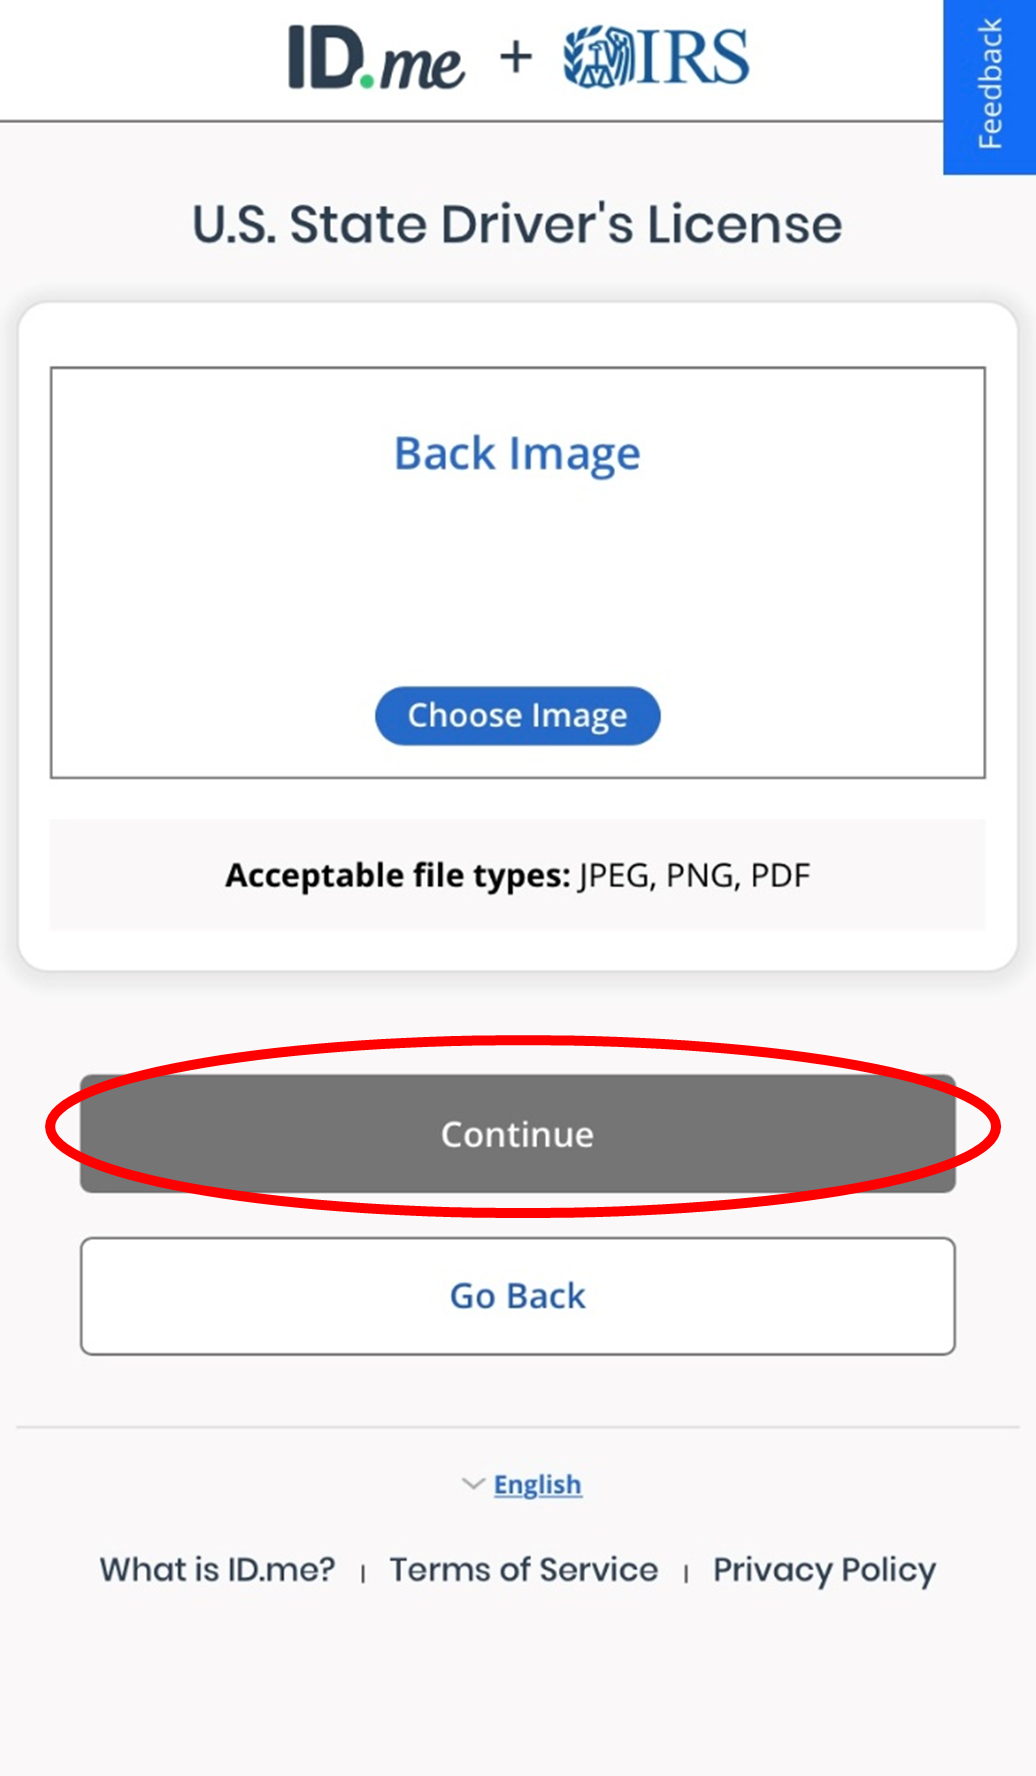
Once you select your document type, you will be taken to this next page. This guide, uses a U.S. State Driver’s License and a U.S. Passport as an example.
Note: Pay attention to the type of image you must upload (the front image, back image, picture page, etc.). Click the blue “Choose image” button to select the image of your document from your device’s camera roll.
Once you upload the image, you will be asked to confirm that it is not blurry, shows your name and date of birth, and includes all four corners of the document in the photo. Click “Continue” when you are ready.
After you upload your first document (your primary document), you will be taken back to the previous page to select your second document (either a primary document or secondary document). Repeat the above steps until you have uploaded and submitted all your documents.
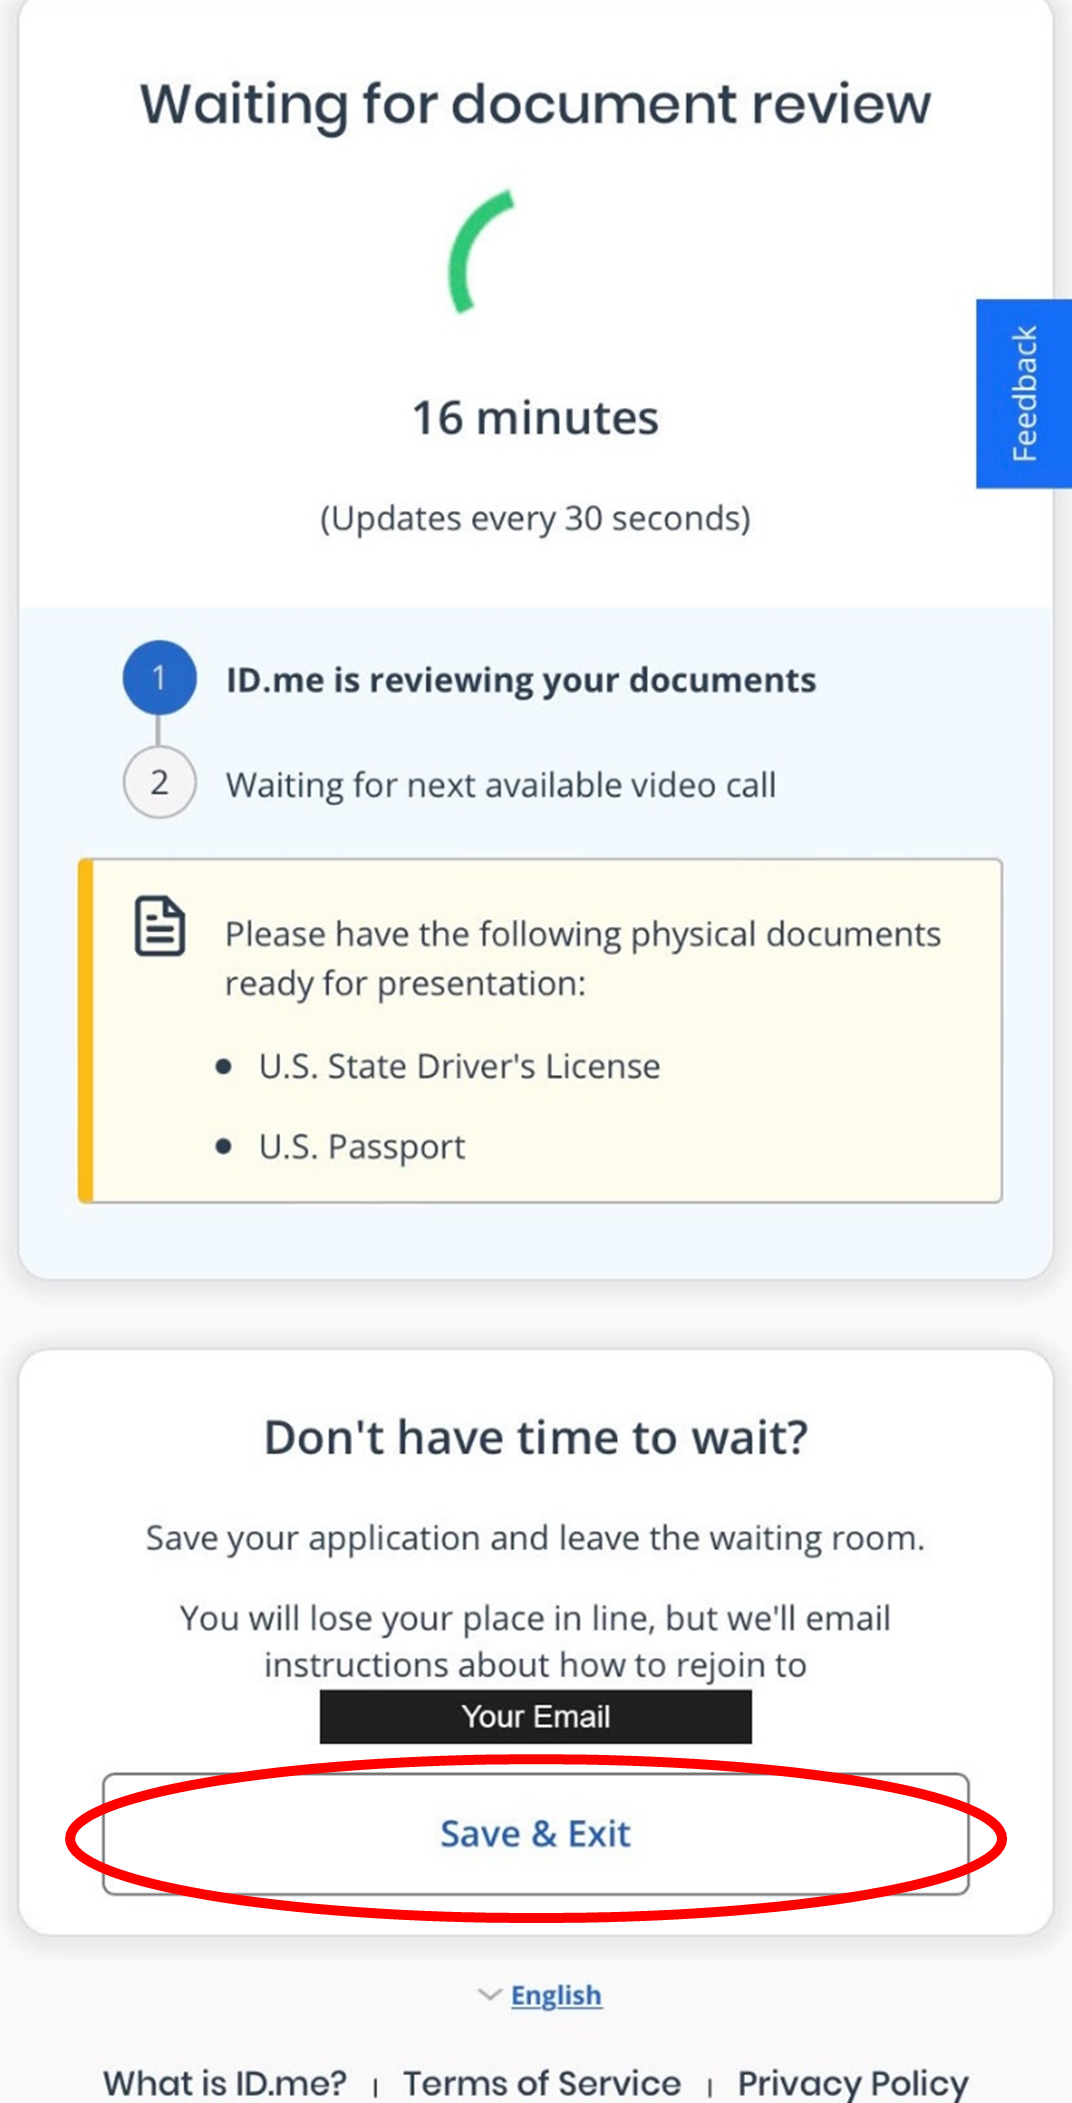
Step 13E: Wait for your documents to be reviewed
You will be taken to this page to wait for your identity documents to be reviewed. Wait times are displayed and continuously updated. While you are waiting, review your personal information and documentation to ensure they are accurate.
If you do not have time to wait, you can click the white “Save & Exit” button at the bottom of the page to have instructions emailed about how to rejoin the virtual agent call waiting room.
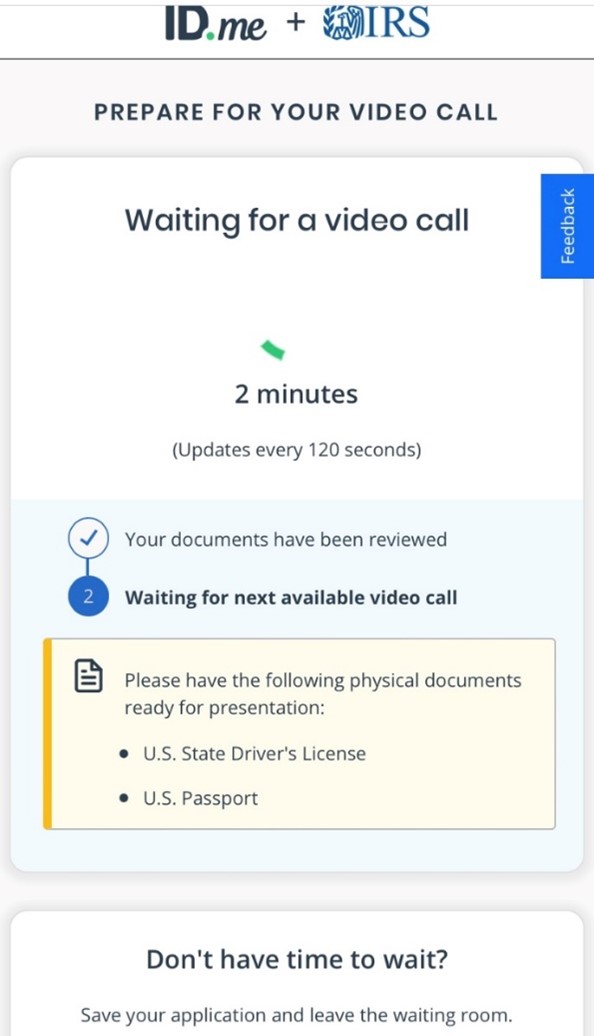
Step 13F: Wait to join a call with a video chat agent
When your documents are successfully reviewed, you will see the page below. Click the blue “Join video call” button when you are ready. You will be taken to another waiting room with an estimated wait time.

When it is your turn to join a call with a video chat agent, you will receive a text message to your cell phone number that looks like this:
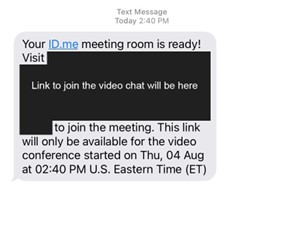
Step 13G: Join the meeting with the video chat agent
Click the link in the text message to join the video call with the chat agent. You will be on camera with them, and they will give you instructions on what they need to see. You will need to verbally confirm the personal information you submitted and show your primary documents on camera to verify your identity.
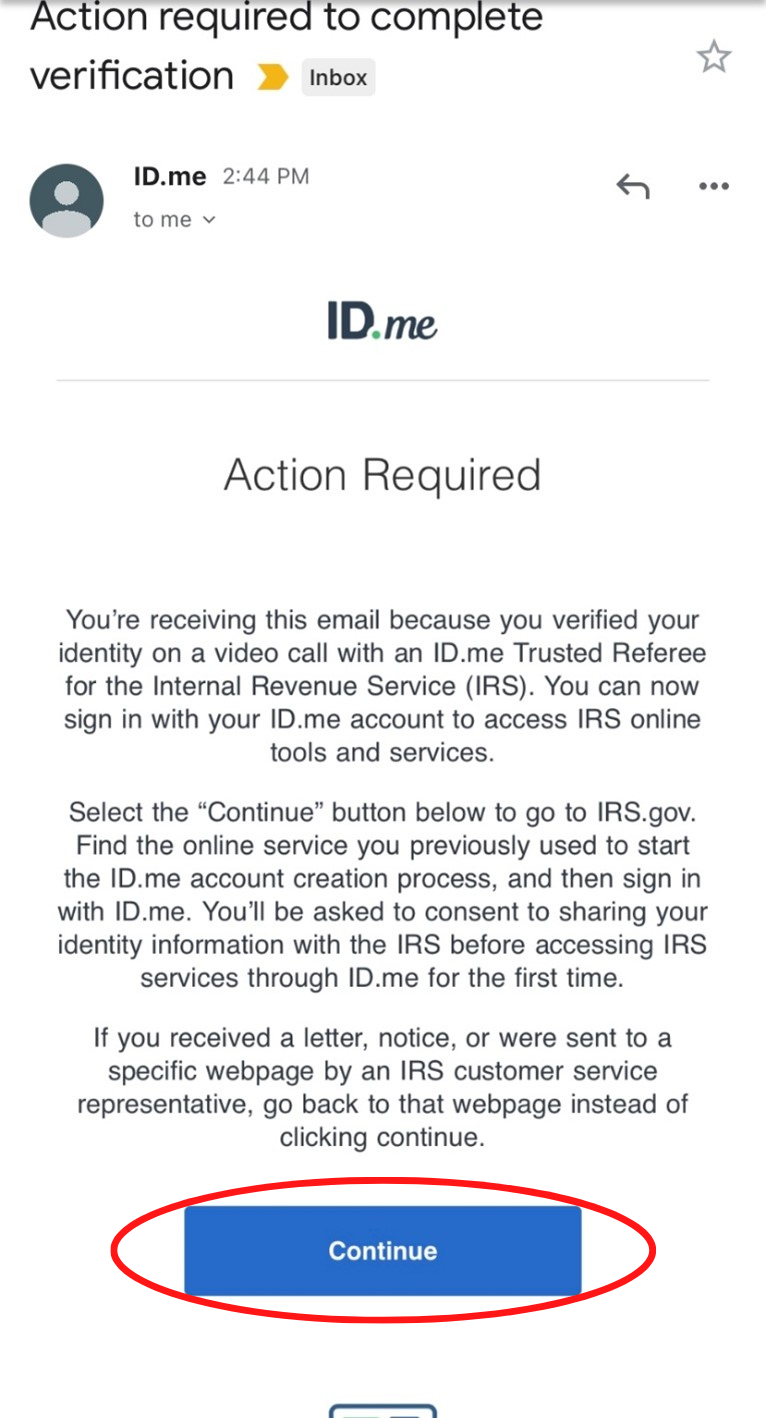
Step 13H: Log into your ID.me account
Once your call with the video chat agent has completed, you will receive an email from the sender “ID.me” with the subject “Action required to complete verification.” Read through the information and click the blue “Continue” button.
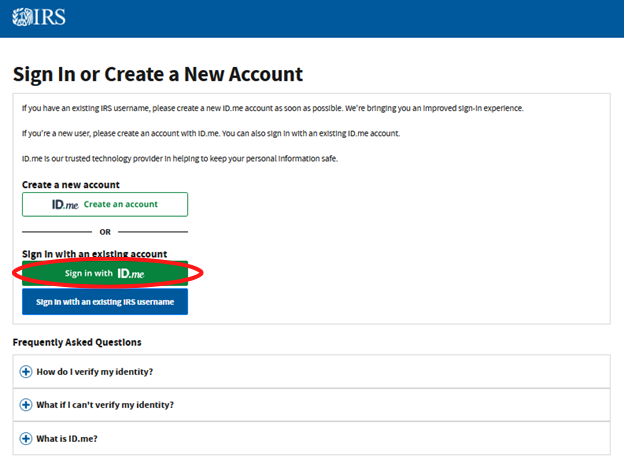
You will be taken to the IRS Sign-In Webpage Click the green “Sign in with ID.me” button and follow the instructions to sign into your account.
After you sign in, you will see a screen confirming that you have verified your identity.

Success! You can close that window and return to the IRS Sign-In Webpage. Click the green “Sign in with ID.me” button again and sign in to view your IRS online account.
Need help?
ID.me offers 24/7 multilingual support. Additional resources are available at help.id.me, including the option to submit a support request through ID.me Help Center Portal.